Tag: game jam

Trenchbroom – Geometry Basics

In this post, we’ll go through the basics of geometry building in Trenchbroom. I had originally intended to write this blog post as a complete guide that explored all aspects of the engine (viewport navigation, hotkeys, brush creation, entities, custom WADS etc.), however this felt incredibly boring and redundant as there already is extensive documentation out there presented in a much more engaging way. It also felt a little unintuitive as the best way to learn how to use an engine is not to read pages of documentation but to simply boot it up and start experimenting with it. With this in mind I’ve pivoted the blog post to focus more on the basics of Brush Geometry and helping first time users get used to the editor so as to get you started and walking (you’ll be running in no time).

I’ll be ignoring a lot of the nuances of the engine (partly as I am still learning myself, but also to avoid cognitive overload of features that might not be needed for a new user). Dumptruck_ds’ tutorial playlist provides short tutorial videos that go into more detail on each of the tools of Trenchbroom which I highly recommend watching if you want a deeper understanding of specifics. And of course the Trenchbroom 2026.1-RC3’s reference manual should cover almost anything else you could possibly want to know about the engine.

So, lets get started.

Navigating your way around the editor

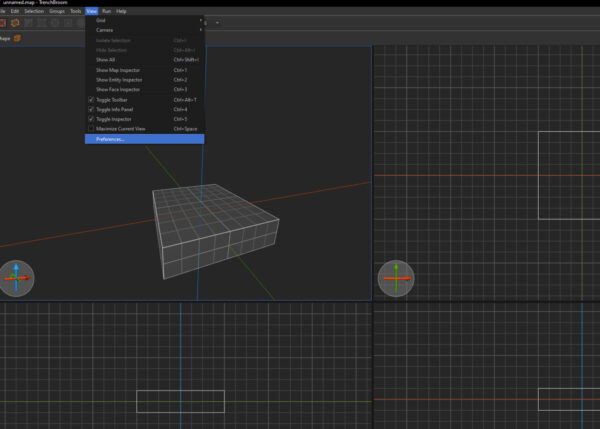
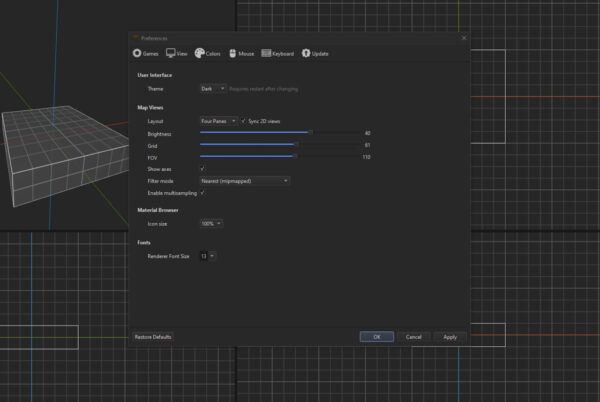
Lets start by learning our way around the editor and the viewports. By default Trenchbroom loads up with a single 3D perspective view; For a brush-based map that’s built to a grid, this feels clunky as I prefer to do a lot of work on the orthographic views. So my first suggestion would be to select “view -> preferences”, and in the View tab, adjust the layout configuration to “Four Panes”. This will give you the 3 orthographic views; front, top and side. Whilst you’re here, you should also set your Theme to “Dark” mode because you’re not a barbarian. There are other accessibility settings you can play around with in this mode, and this Preferences window is where you can also edit hotkey shortcuts (which might be applicable to your workflow). I’ve edited some of my hotkeys to closer align with other more standard engines, but in this blog post, I will always refer to their default hotkeys.
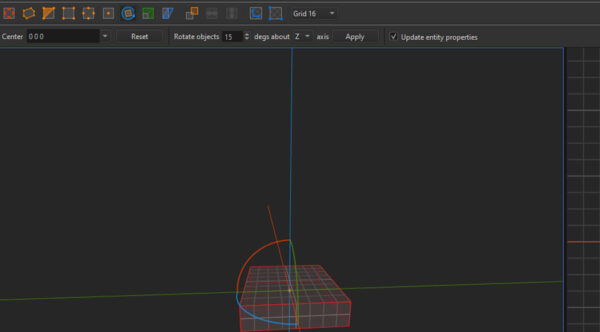
Some icons in the UI are context sensitive. You will see this with the tools icons at the top that are currently greyed out. To enable those icons, select the default brush in the scene and notice the icons become selectable. You can select the icon to switch tool mode or hover over the icons to see their name and associated hotkey (you don’t need to memorise the hotkeys now as that will come with time and experience within the engine, but the sooner you learn them the quicker your mapping workflow will become). Selecting a tool will sometimes bring up a secondary row of options below (i.e. degrees of rotation snapping on with the Rotate Tool or scale factor with the Scale Tool) and these can further refine your usage of the selected tool.
Down the right hand side of the editor you the Inspector Tabs; Map, Entity and Face.

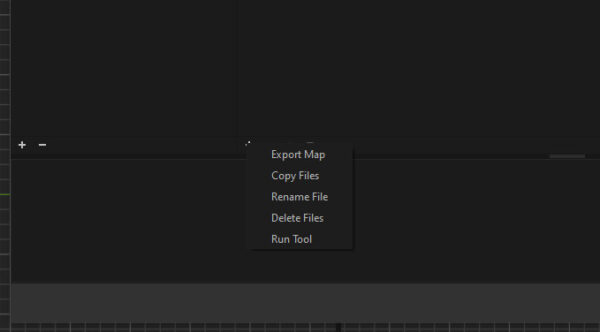
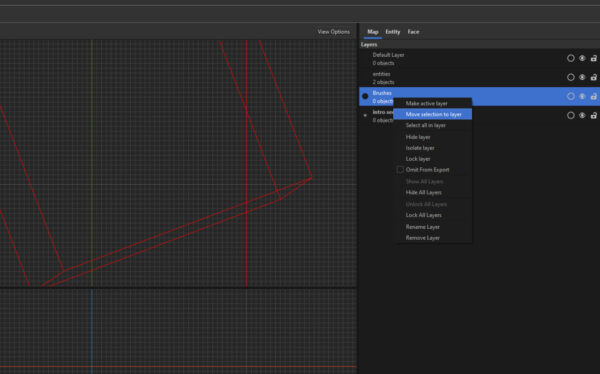
Within the Map tab you have the Layers window, which is useful for organising your work and aiding in your work flow. It sort of works like a primitive hierarchy you would find in Unity and Unreal. You can create new layers, name them and add objects from your scene into them. These layers can be locked, turned on and off and omitted from your compile entirely should you wish. You can add a new layer by clicking the little + symbol at the bottom of the layers window, and items can be added to the layers by selecting them, right clicking on the layer and selecting “Move Selection To Layer”. There’s also Map Properties and Mods windows below, however I won’t cover those in this post.
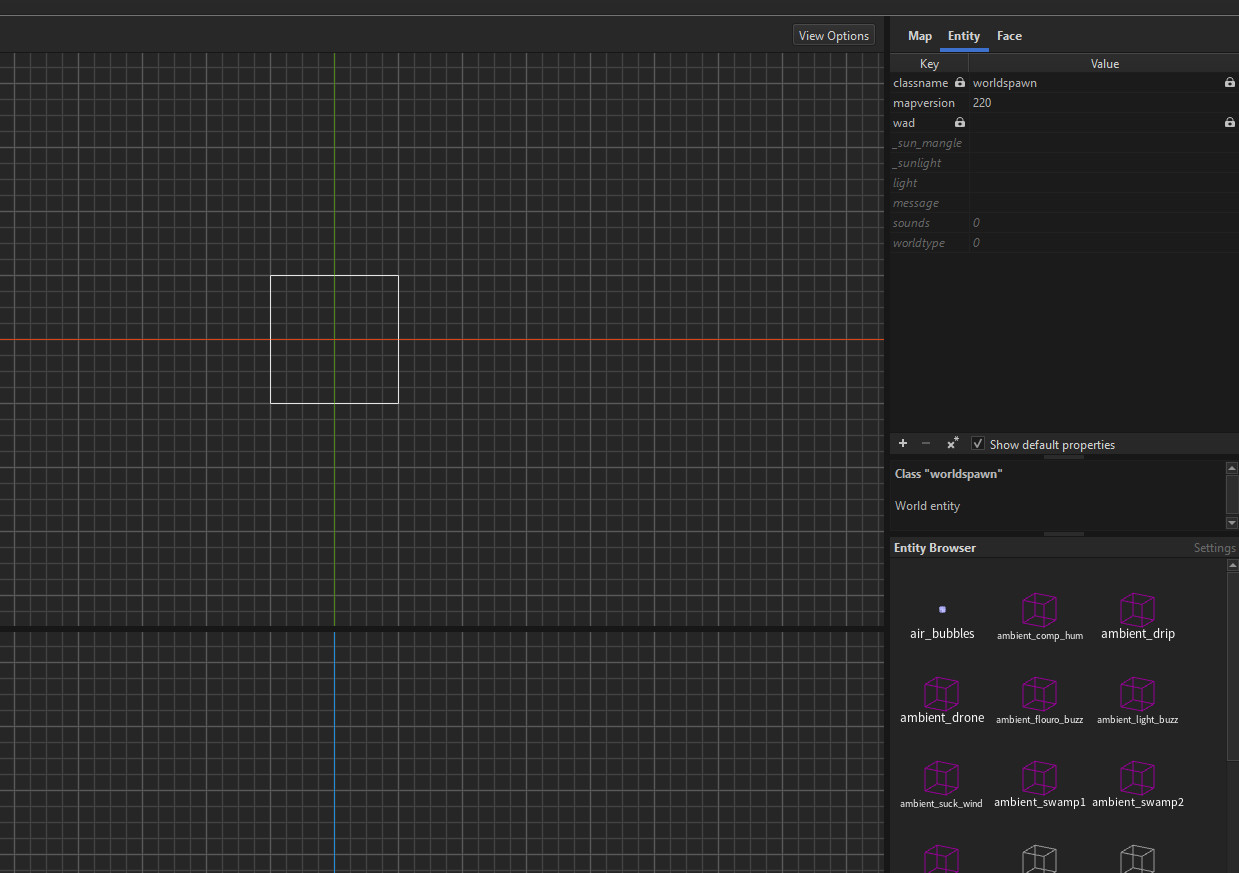
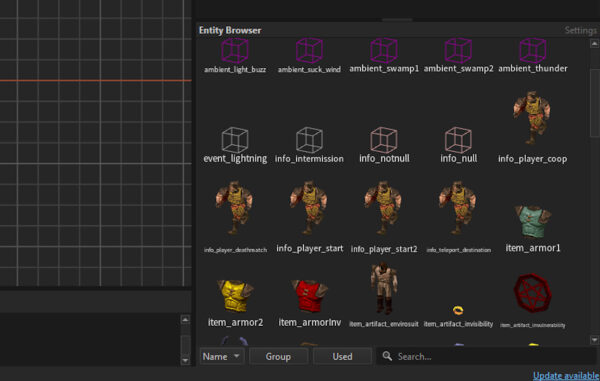
To the right of Map there is the Entity tab. This is the library of entities we can work with when making our map. This is also where we can add WAD files, a collection of textures used to texture brushes, to the project (I briefly mention how to add WADs to your project in the Getting Started blog post, so best refer there for more information if you need). The main window we’re concerned with for this blog post is the Entity Browser.

Entities are packaged up pieces of game logic that can be used to turn a map of brushes and geometry into a functioning game level. Basic entities range from weapons and item pickups to enemies, lights and triggers relays. Alone these pieces of game logic will function, but the true creative power comes from how these entities can interact with one another. I will cover entities, the creation of new entities, brush entities and how to use trigger and relays, in much greater detail in a future blog post; but for now, just know that if you want to place a simple enemy spawn, item pickup or point light, you will want to navigate to this window.
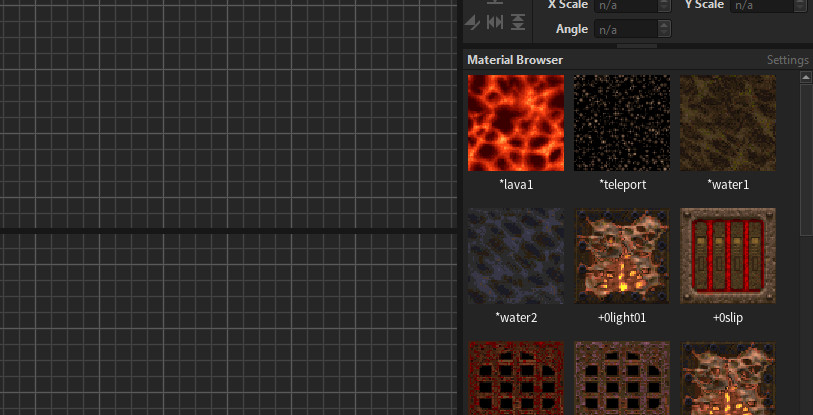
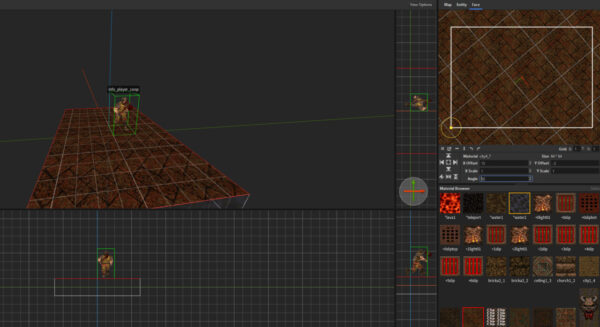
Next to the Entity tab there is the Face tab. This contains the Material Browser which holds all of the textures within the WAD files we’ve added to the project. When applying a texture to a face of a brush, we use this Face tab to select the texture we want, and how to scale, align and rotate the material when its applied to the face. Its something which is better observed through practise than text so:

  • Select the the default scene brush with a left click
  • Hold shift and left click the top face (it should be highlighted in yellow)
  • In the Material Browser, select a random texture
  • Notice how the texture has been applied to the selected face of the brush
  • Above the Material Browser there are tools to manipulate the material on the face of the brush
  • Experiment around them and see in the 3D viewport how this directly affects the look of the brush
  • You can Move the texture around the UV, you can scale it on the X and the Y and  you can rotate it
Finally along the bottom of the editor is the console. This will output in Realtime a log of what is going on inside the editor along with any errors that might occur during your mapping experience. I won’t go into much detail here about the Console, but just know if you see a stream of red error text, it might be worth stopping and investigating what the issue is.

Controlling the Viewports

Lets get used to some basic controls in the viewports as Trenchbroom has slightly different controls from more standard engines like Unity and Unreal. Simply reading these instructions is an awkward way of learning, so I would highly recommend messing around in the editor yourself to learn the quirks of Trenchbroom and also referring to the Trenchbroom 2026.1-RC3’s reference manual for a reference on everything you can do (as there is a lot of stuff that I will be missing here).

Moving

  • To move around the 3D viewport, hold down the right mouse button and pan around with W,A,S,D
  • To speed up or down the pace at which camera moves, hold down the right mouse button and scroll the mouse wheel either towards you (to slow it down) or away (to speed it up)
  • Scroll the mouse wheel by itself to zoom in and out
  • Holding Q or X can be used to pan the viewport up or down

When working in the 2D orthographic viewports:

  • Panning is instead done by holding down the right mouse button or the mouse wheel and moving the mouse around
  • Zooming in and out uses the mouse wheel, just like the 3D viewport

Selecting

  • To select a brush or an entity, simply click the left mouse button on the object you wish to select
  • Move the selected object around by clicking and holding down the left mouse button on the object and then moving the mouse
    • You’ll notice if you do this in the 3D viewport, the object is locked to the X and Y axis
    • If you want to move the brush up and down along the Z axis you’ll need to hold down the alt key whilst you drag
    • For this reason alone I find myself predominantly using the 2D orthographic viewports for brush creation and manipulation (perhaps its just my years of experience within Source but it just feels more natural and less clunky – your mileage may vary)
  • To select multiple objects hold the ctrl key down and click the left mouse button on each object you wish to select
  • You can also hold the ctrl key down and then click and drag left mouse button over multiple brushes to select them
    • Make sure you have ctrl held down before you click and drag else you’ll duplicate the brush
  • To select the face of a brush hold down the shift key and select a face by clicking the left mouse button.
    • Like with objects you can select multiple faces by also holding down the ctrl key
  • Select all objects within the scene by holding down ctrl pressing A
    • Note: Only objects that aren’t hidden or locked will be selected
  • To deselect everything hold down ctrl + shift whilst pressing A

Creating and manipulating Brushes

The core geometry of the level is built using CSG (or BSP brushes as they are more commonly referred as). There’s no need to go into huge detail about what the brushes are, just know that they are the building blocks of your level. They can be placed, scaled, rotated. You can manipulate each of their vertexes, you can add additional vertexes. You can apply materials to each individual face, and you can even turn them into entities that can have game logic applied to them. This is what 80% of your time in Trenchbroom will be spent working with so its best to get used to them. I’ll go over some of the very basic controls and tools you need to get started:

Brush Tool (B)

Pressing B selects the Brush tool. To create a simple brush:

  • Ensure no other object is selected by deselecting everything either by holding Ctrl+Shift+A  or pressing Esc
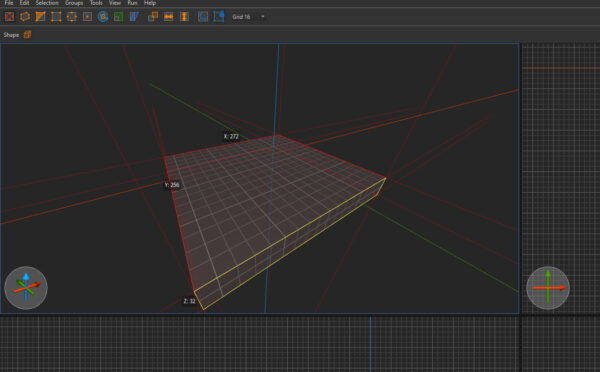
  • Hold down the Left Mouse Button anywhere in any of the viewports and drag out the shape
  • Whilst still holding down the Left Mouse Button, hold Alt and drag up to give the brush a bit of height (this will only work if you’re creating the brush in the 3D Perspective Viewport
  • Release the Left Mouse Button to create the brush
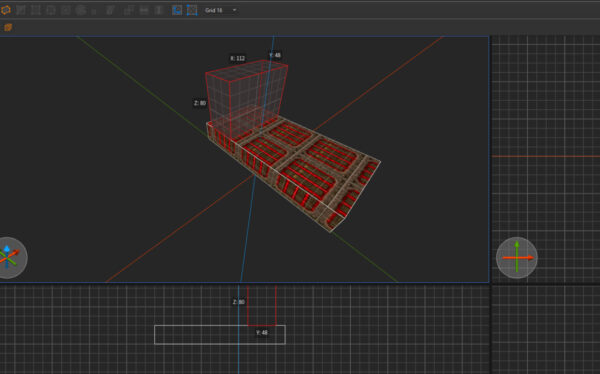
 

To manipulate the shape and the size of the brush we can move the individual faces in the same way:

  • Hold Shift + Left Click on the face of the brush you wish to move
  • Click and drag the face in the desired direction (Notice that the face is locked to its oriented axis)
  • Release the Left Mouse Button to finalise the edit
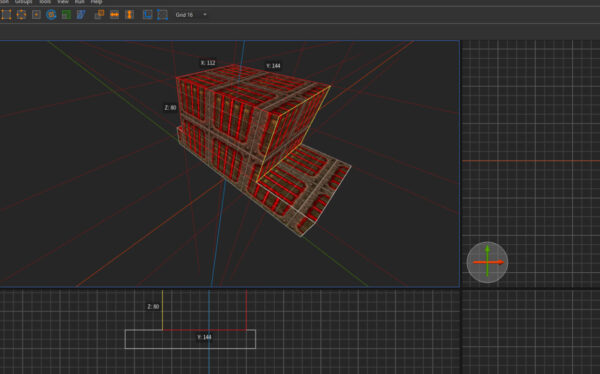
The Scale Tool (T) can also be used to achieve the same effect as above, however I personally find this to be a little more awkward than simply holding shift (but maybe you might find it a better method).

Brush Shapes

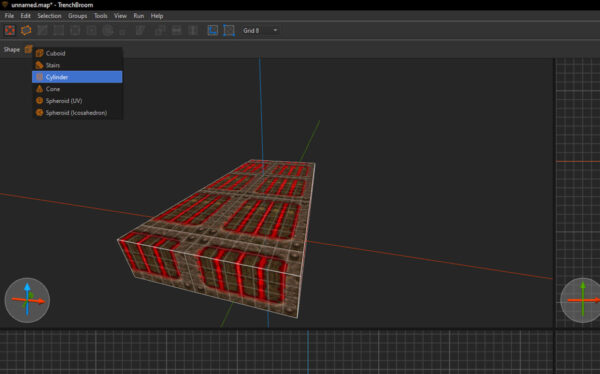
Underneath the Brush Tool icon, you’ll see a little orange cube. This can actually be clicked to reveal a drop down menu of the brush shape you can build. I won’t get into every single shape in this post as there’s a few to explore and they each have their own settings, but explore and experiment with using different shapes to see what interesting geometry you can create.

Rotate Tool (R)

This tool is pretty self explanatory, it allows you to rotate a selected brush or entity:

  • Select the object you wish to rotate
  • Select the Rotate Tool or press R
  • To rotate the object either:
    • Click and drag the widget on the desired axis or
    • Hold alt and use the arrow keys to rotate around the X and Y and Page Up / Down to rotate around the Z
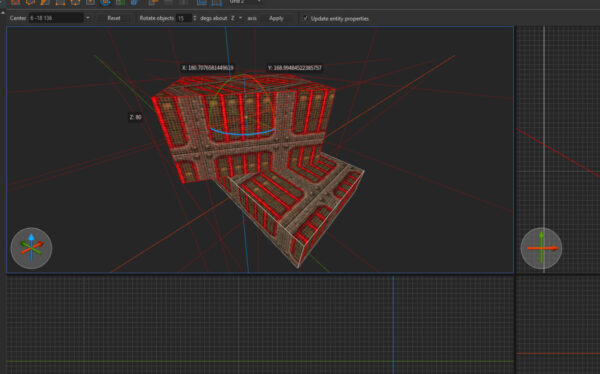
Notice that some additional options have appeared below the tools bar, and these can be changed to give you more control over the rotate options:

  • The first is the pivot point around which you want to rotate the object
    • The initial value is the centre of the brush
    • 0 0 0 is the origin of the map
    • or you can put your own 3 values in if there is a specific point you wish to rotate around (just hit Return when you have entered your 3 values)
  • In most cases however you’ll like just want to rotate around the centre pivot of the brush, and if the pivot has been placed in a position you don’t want you can click the reset button to return it to the centre
  • The second option is the degree of snapping you want when rotating an object
  • I personally would ignore the third and fourth option, but this is if you just want to have the rotation be applied a single time around a certain axis by a click of a button

Clip Tool (C)

The Clipping tool allows for the slicing up of brushes (again something better demonstrated than explained):

  • Create a new brush
  • Select the Clipping Tool by pressing C
  • Notice how a little orange dot has appeared and snaps to various points on the grid
  • Select the first point anywhere on the mesh to set the anchor point. This will determine where the slice will start
  • Select a second point on the mesh to specify where you want the slice to finish
    • This might get a little awkward in the 3D perspective viewport, so I typically use the orthographic viewports for this
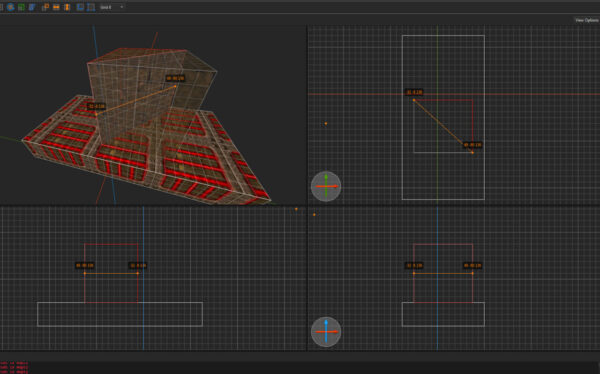
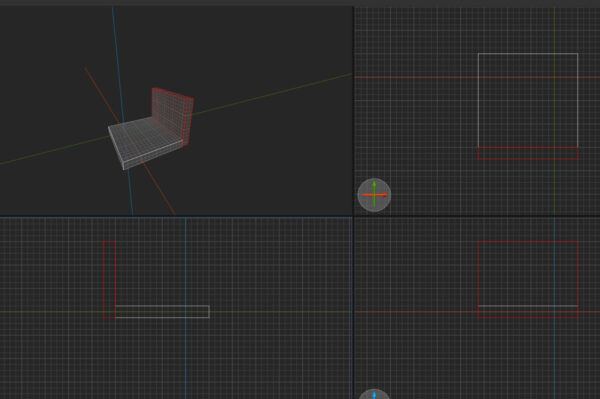
You’ll notice that one side of the slice has now turned translucent (see above). If we were to complete the clip right now, the Opaque side of the brush will remain, whilst the translucent side of the brush will be removed.

  • We can switch which side of the brush we want to remove by holding ctrl and pressing Return to cycle between all 3 options
    • Remove Side 1, Keep Side 2
    • Remove Side 2, Keep Side 1
    • Remove neither side but add a new edge where the slice would be made creating two separate brushes
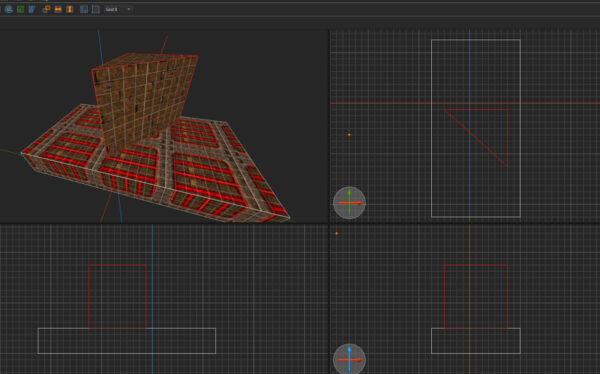
  • Once you’re happy with what slice you want to make press Return to complete the action
Vertex Tool (V)

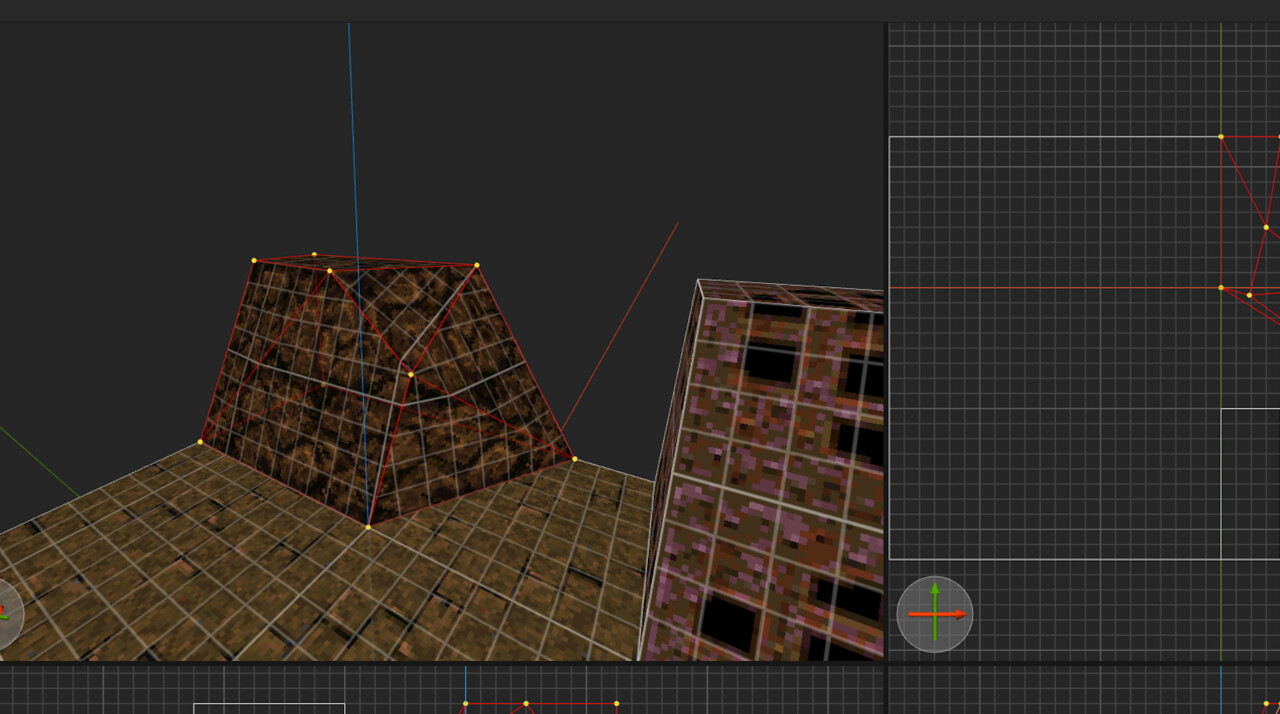
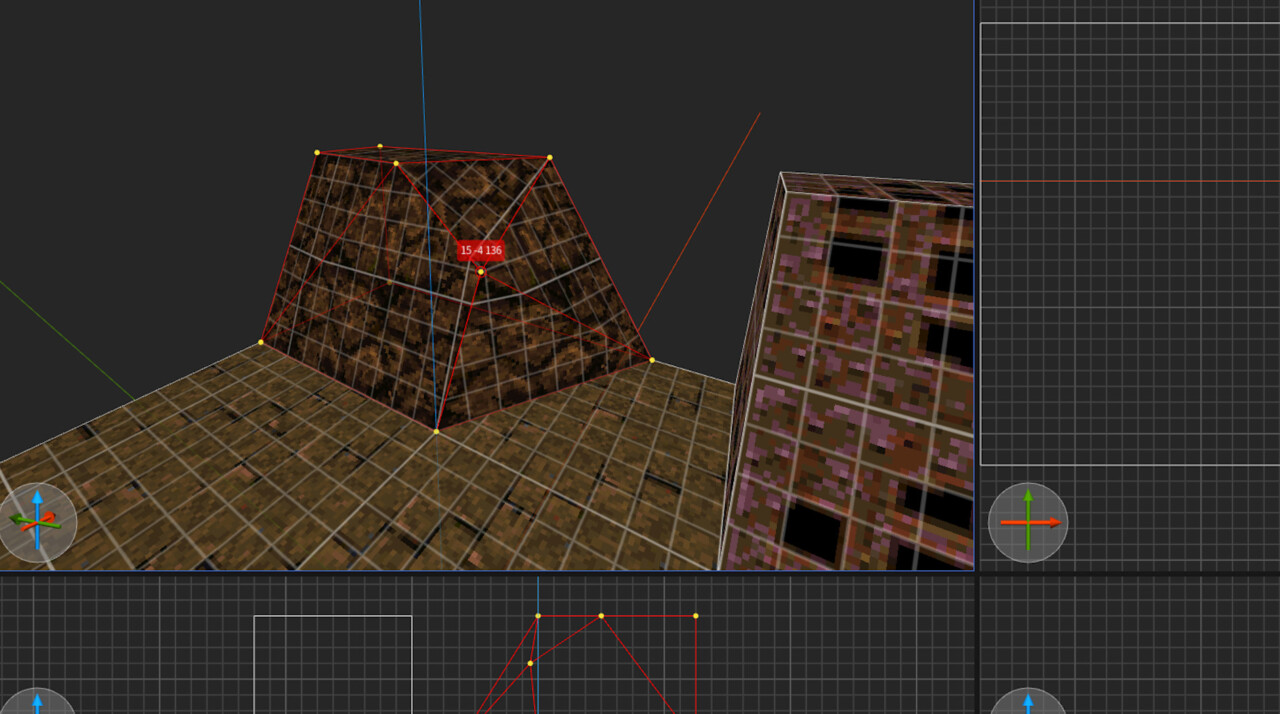
The Vertex Tool gives us the freedom to manipulate the brushes into more interesting shapes by moving individual points of the brush. When combined with the clipping Tool this can very interesting geometry:

  • Select the Vertex Tool by pressing V
  • Notice that individual vertexes you can manipulate appear in yellow
  • Select one of the vertexes by pressing and holding the left mouse button
  • Drag the vertex in the direction you want to skew the brush
    • Notice that if this is done in the 2D Orthographic Viewport, it will select all vertexes on that specific point irrelevant to their depth
    • If you wish to move a specific vertex on that specific point, it must be done in the 3D Perspective Viewport
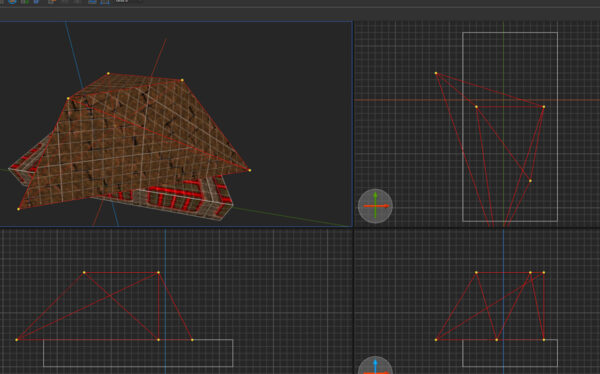
  • You can add a new vertex to any edge of a brush by holding Shift and then clicking and dragging the left mouse button from a point along the edge of a brush
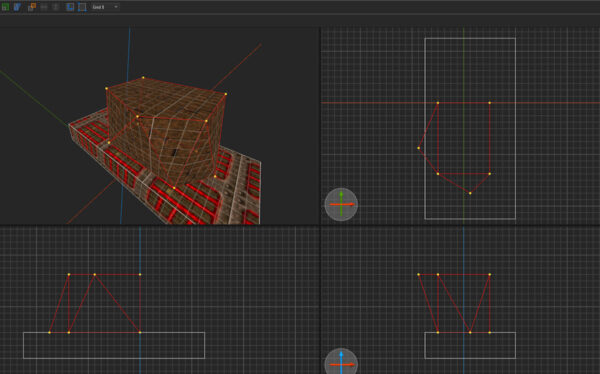
If you wish to merge two vertexes together:

  • Select the first vertext
  • Hold Shift + Alt and click on the vertex you wish to merge it to
  • Notice how it merges the first vertex to the second’s location
  • Its important to note, that if at any point vertexes overlap with one another, they are automatically merged into one single Vertex
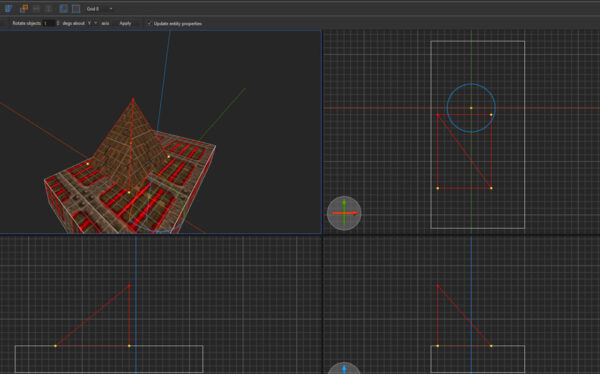
Edge (E) and Face (F) Tools

I won’t go into much detail about these specific tools, as they are relatively self explanatory but they allow you to manipulate either an entire edge or face of a brush. Selecting these tools will highlight a yellow point that you can click and drag.
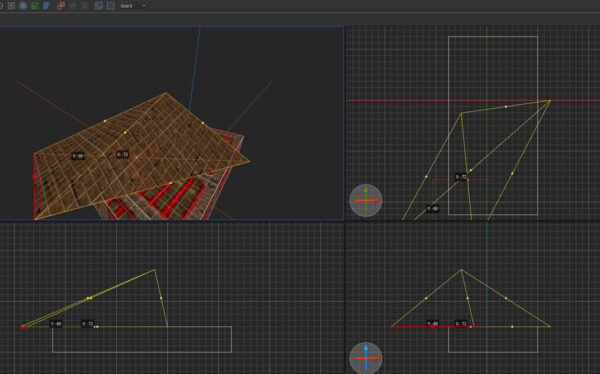
Useful functions

Finally here are some useful little functions and hot keys that might help in your map making flow:

Isolating and Hiding Brushes

This function can be very useful when you want to focus on a small section of a much larger map as it cleans up the orthographic viewports making them easier to use:

  • You can isolate an individual/group of brushes by holding shift and pressing I
  • This will hide all other brushes allowing you to just focus on the brush(es) that you had selected
  • You can hide an individual/group of brushes by holding ctrl + alt and pressing A
  • This will hide the brush(es) you had selected
  • If you want to unhide all other brushes from either command hold ctrl + shift and press I

Grouping Brushes

This combines numerous brushes into a single group of brushes. To add multiple brushes to a group:

  • Select all the brushes you wish to add to the group
  • Hold ctrl and press G
  • Give the group a helpful name (it doesn’t have to be unique)
  • Notice how a purple bounding box now surrounds the group
  • Clicking on a single object within the group will select the whole group
  • If you wish to edit the group, double click the left mouse button on any brush within the group
  • You are now editing only the brushes present within that group
  • To exit a group, press esc

To remove a group:

  • Select the group you wish to remove
  • Hold ctrl + shift and press G
  • This doesn’t delete the contents of the group, just the group itself

To add/remove brushes to/from a group:

  • First select the brush you want to add to an already existing group
  • Right click on a brush within the group you wish to add it to
  • Select “Add objects to group [groupname]”
  • To remove an object from a group, first double click on a brush in the group
  • Select the brush you wish to remove
  • Right click on the brush and selected “Remove objects from group [groupname]”

Centring The Camera

This is the equivalent of the F key in Unreal and Unity and is very useful for re-orientating yourself when your map begins to balloon in size:

  • You can centre the camera on a selected object by selecting the object you wish to focus on
  • Hold ctrl and press U
  • This will focus the camera on the selected object

Hiding UI Elements

Lets say you want to purely work on geometry and want to maximise your screen space. You may want to remove unneeded UI elements:

  • To remove the inspectors on the right, hold ctrl and press 5
  • To remove the console at the bottom, hold ctrl and press 4

Conclusion

OK, I think that’s enough for now. I was very conscious about getting this blog post out before the start of the mapping jam, so there’s likely a whole handful of useful tips and tricks I’ve forgotten to write about. But the ultimate goal of this guide was to get mappers started with exploring the engine and building brushes.

Next time I’ll explore entities and turning the basic geometry of you map into something that is actually playable. Ciao
Trenchbroom – Getting Started

In order to start building a map for Quake, we’re going to need to install Trenchbroom and get it all set up. There are countless tutorials and guides out there that you can follow, but I figured there was no harm in me adding yet another one to the internet. Most of the information here has been compiled from dumptruck_ds’ quickstart tutorial video and from the Trenchbroom 2026.1-RC3’s reference manual, and whilst this can be a somewhat awkward and cumbersome task at first, once you’ve done it, you’ll never have to do it again. For the game jam and for this installation guide, I plan on using the latest released version of Trenchbroom which is v2026.1-RC3 on a Windows 64bit OS. For those who plan on using MacOX or Linux, I’m sure installation and set up instructions can be found online with a quick google search.
Preparation

Before we get started we will need to do a little prep work:

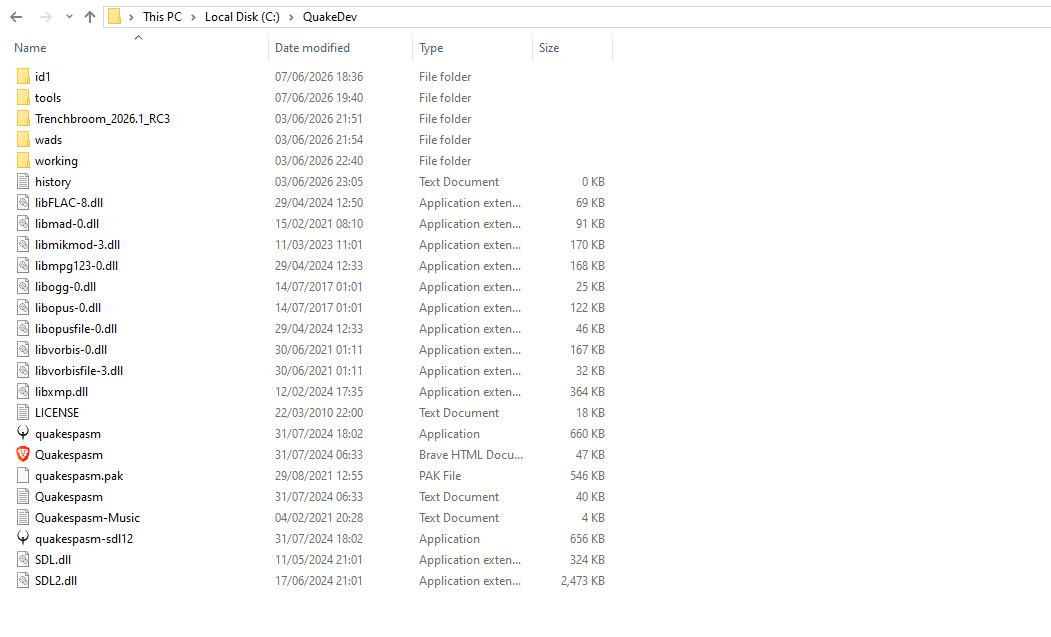
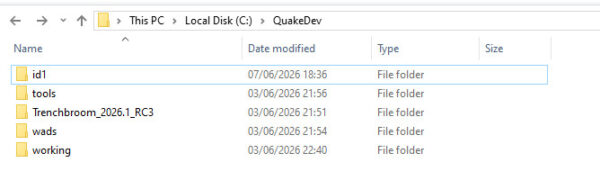
  • We start by making a folder in the Root of our main Drive (it doesn’t matter what you call it, but the important thing is that it is in the root of the drive)
  • For me, this is my C: drive, and I’m going to name the folder QuakeDev
  • Inside of that QuakeDev folder we’re going to add 5 more folders:
    • id1
    • tools
    • Trenchbroom (I name this the version of Trenchbroom I’m using)
    • wads
    • working


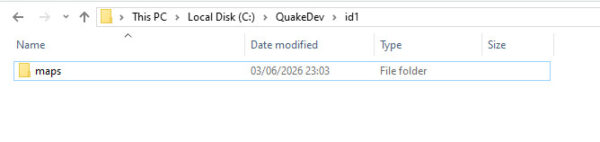
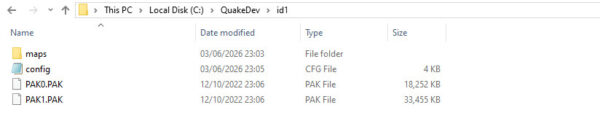
  • Within the id1 folder, create another folder called maps

Setting Up Trenchbroom

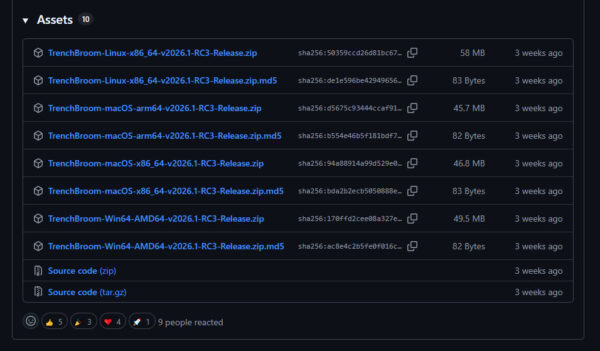
As mentioned in the introduction, I’m going to be using Trenchbroom v2026.1-RC3. This is (at the date of writing) the most recent version of Trenchbroom. You are free to use whatever version of Trenchbroom you desire however:


The changelog also suggests Window users download and install Microsoft Visual C++ Redistributable for Visual Studios (a link to which can also be found in the change log). I already had it installed previously from my work in Unreal and Unity, so I can’t verify if this is 100% necessary for our Quake mapping purposes, but there’s no harm in installing it just in case.

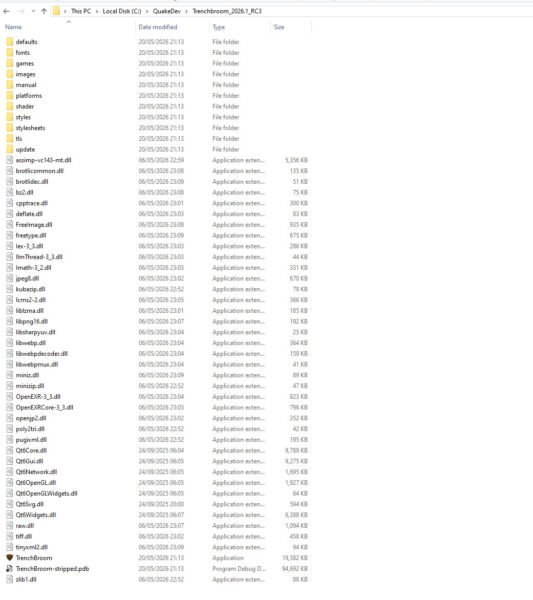
  • Extract the Trenchbroom files into the trenchbroom folder you created.


Next we’re going to need to populate Trenchbroom with Quake content. This comes in the form of PAK files. Simply put, a PAK file is used to store data that will be extracted and loaded by the Quake engine (this is typically game data, entity definitions, maps, sounds etc). In order to find these PAK files, you will need to obtain a legitimate version of Quake. I personally recommend the Bethesda remaster on steam. Not only is it relatively cheap and comes with all of the official expansions but there’s a whole host of QOL changes to graphics and input options that make the game far friendlier to play in 2026).

Pak0.pak is necessary for all Quake games to run, and pak1.pak appears to be needed too if you want the full library of Quake content to work with.

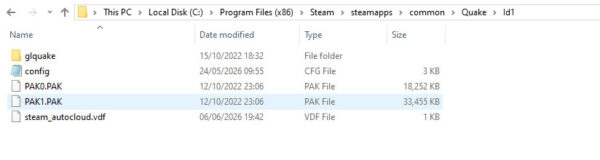
  • Navigate to the Id1 folder in your game directory (mine is C:/ProgramFiles(x86)/Steam/streamapps/common/Quake/Id1)
  • Copy the following files:
    • config (if this file is missing, don’t worry – config.cfg will generate the first time you compile and test a map).
    • PAK0.PAK
    • PAK1.PAK


  • Return to the QuakeDev folder you created in the previous section and paste these files into the Id1 file you created


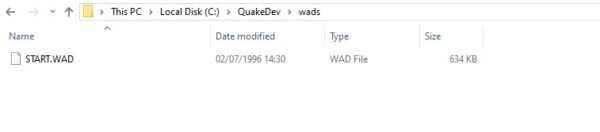
Textures are stored on WAD files, and we’ll need these as well. Unfortunately these aren’t directly available in the Quake game directory like the PAK files, so we’ll have to source them externally. Quaddicted is a great source for all things Quake related and the WADs can be found here easily to download. Just to get things working, find and download the start WAD and put it into the WADs folder in QuakeDev.

Downloading Compiling Tools

Once we’ve made a map, we’re going to need to compile it. Ericw-Tools is the standard compiling tools for many Quake mappers and they can downloaded directly from the website. I personally went with the stable branch, however I have no reason to believe the alpha branch is any less usable (and its probably better in many regards).

  • Go to Ericw-Tools
  • Download the either the Alpha or Stable version of the compiler tools
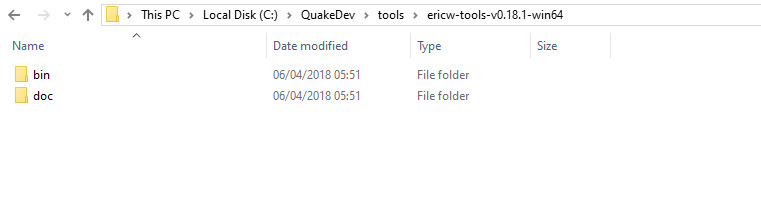
  • Add a folder in your QuakeDev/Tools folder with the same version number of the compilers (mine is ericw-tools-v0.18.1-win64)
  • Extract the files into that folder


At this point in other older tutorials, they will suggest you download Necros compiling GUI. This offers a developer friendly GUI to run the Ericw-Tools compilers we just downloaded, however newer versions of Trenchbroom have an integrated GUI that can handle that task instead, so it makes more sense to use the internal tools rather than adding another third party software to the workflow. If you still wish to install and use Necros Compiling GUI however, dumptruck_ds’ video has a link and all the information needed to set it up). For this tutorial however I will show you the configuration of the compiler using Trenchbrooms integrated GUI.

Downloading Quakespasm

The final stage of preparation is to set up the game files that will run our map when we’re mapping and testing. Most guides (including dumptruck_ds’ quick start guide) suggest using Quakespasm. Quakespasm is a cross platform Quake engine based on the SDL port of Fitzquake. I tried to dig up some reasoning as to why you should use this over the remaster on Steam as a way of playing your maps, and the only real answer I could get is that the load times are quicker and its less prone to bugs. I might experiment with this more, but for now let just download Quakespasm.

Final Setup

Now that all of the files are downloaded and placed, lets check Trenchbroom to ensure everything is working properly and get a very basic box room made up and compiled.

  • Open Trenchbroom via the Trenchbroom.exe in your QuakeDev/Trenchbroom folder
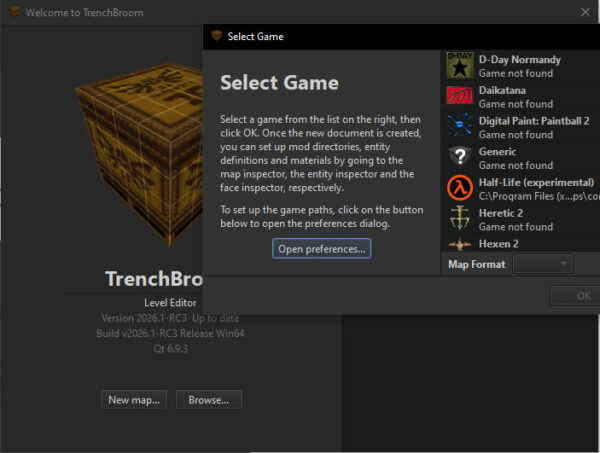
  • Click “New Map”
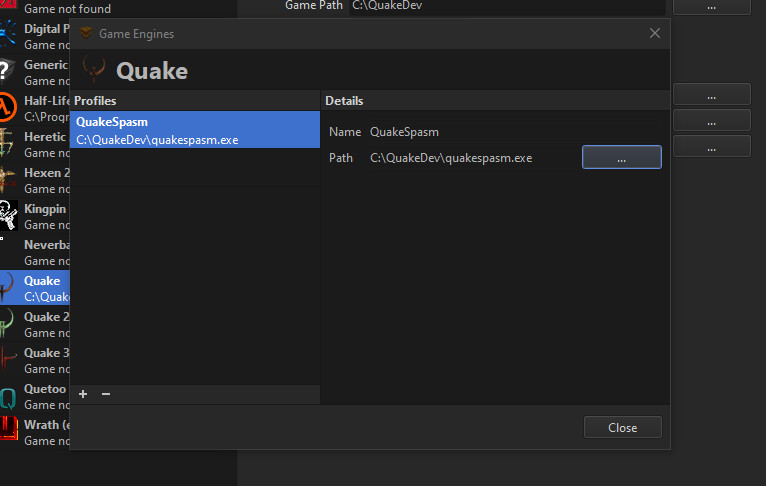
  • Click “Open Preference” and select Quake from the list on the left
  • Click “Configure Engines” and make a new profile by clicking the little + button on the left
  • Name the Profile something useful (I called mine “Quakespasm”)


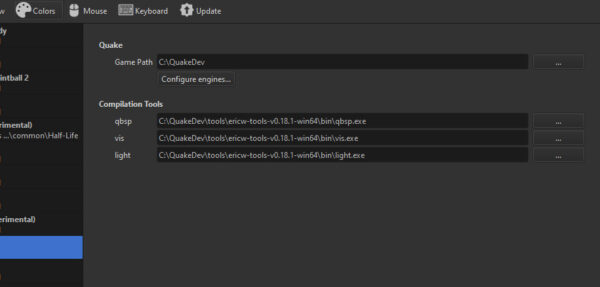
  • Ensure the “Game Path” points to your C:/QuakeDev folder (as that’s where we extracted Quakespasm to)
  • For each of the compilation tools, assign their path to the C:/QuakeDev/tools/ericw-tools/bin folder
  • Each compilation (qbsp, vis and light) will be in the bin folder


Whilst here you can also change the theme from system to dark in the view tab (very important) as well as adjust the layout, grid thickness, brightness, FOV (as well as a whole load of other editor options to play around with). I personally work on a four panes layout with everything else set to default.

  • Click OK to apply the changes close the window.
  • Select Quake from the list (ensure Map Format is “Valve”) and click “OK”

This will open the editor ready for you to start mapping! To ensure everything has been set up correctly, you can check the “Entity tab” in the right. Entities are game pieces we can work with in map making and they are extracted from the PAK files we added to the id1 folder in QuakeDev. If all previous steps have been followed correctly then the Entity Browser should be full of entities. If not then something has gone wrong and you should go back and retrace your steps through the installation process.


Whilst you still have the entity tab selected, we can add the START.WAD file we downloaded to give us some basic textures to work with.

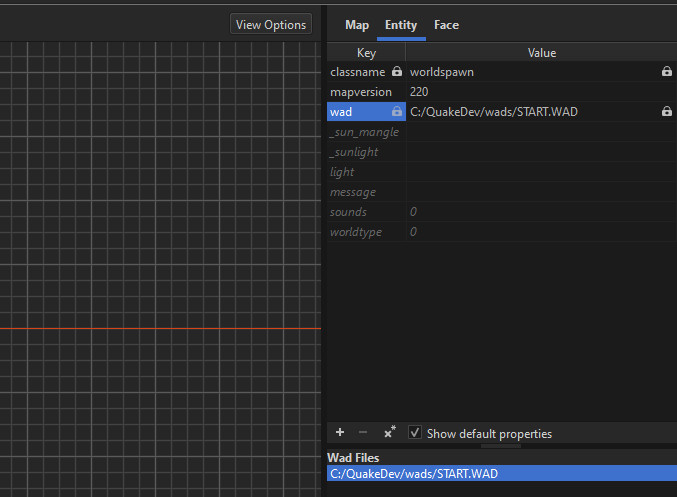
  • From the list in the Entity tab, select the Key “wad” (this menu is context sensitive and clicking wad should display “Wad Files” in the section below the list).
  • Click the + arrow and navigate to your START.WAD file in QuakeDev/wads
  • Select “Absolute” and click “Ok”
  • The WAD and the directory path will appear in the box


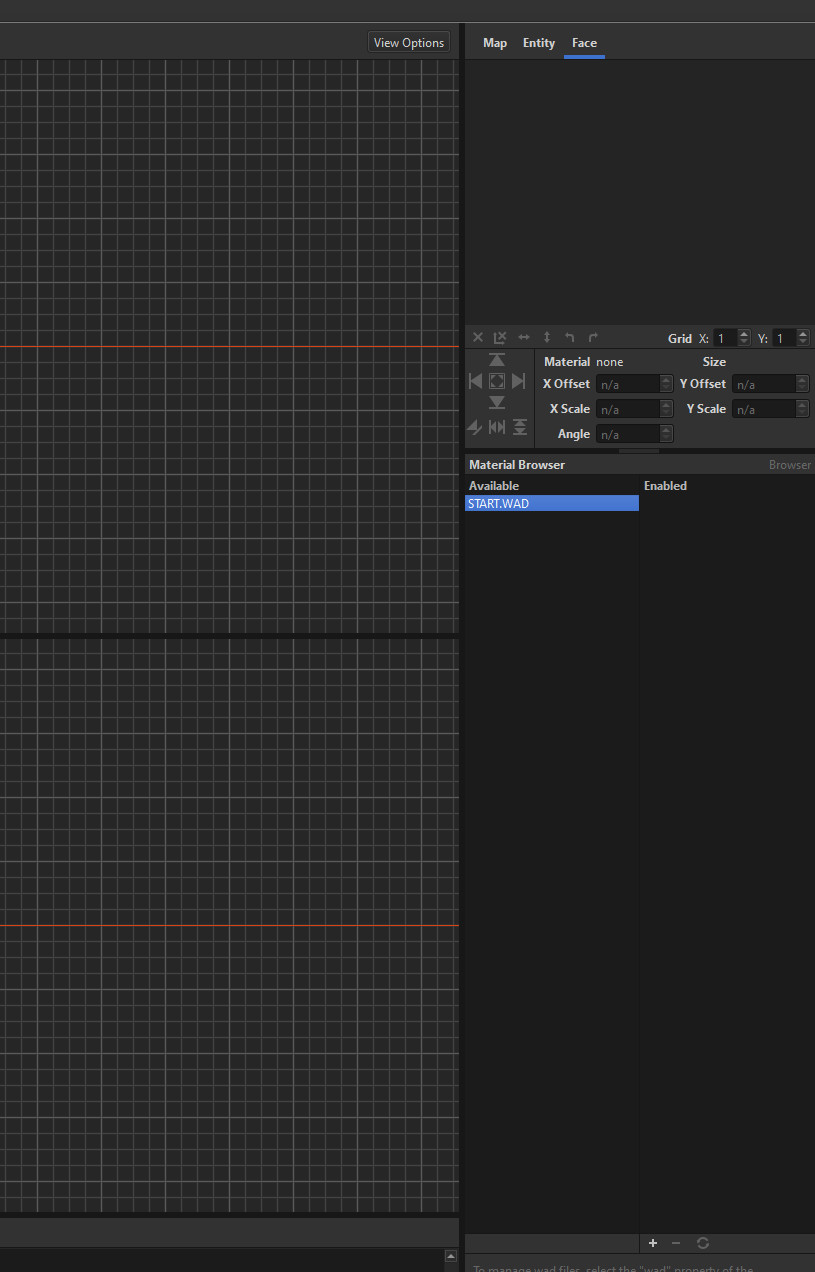
  • You can see contents of the WAD file by selecting the Face tab at the top right
  • If you don’t see any textures, click the title “Material Browser”
  • Select Start.WAD from “available” and click the + icon to move it to “enabled”
  • Click the title “Material Browser” again to see the textures

Compiler Setup

Its now time to set up the compiler for Trenchbroom. What we’re going to do is set up a bunch of sequenced tasks to successfully compile any map we make. You don’t need to know every single detail about a Quake Map compiling process, but it does help to know the basics. Compiling is the act of taking a working map file in Trenchbroom and converting it to a file that is readable by the Quake engine (a bsp file). This typically consists of three stages, QBSP, Vis and lighting.

QBSP is the first stage and is the process that builds and calculates all of the geometry and collision data, as well as extracting needed textures from the WAD file and repackaging them into the bsp file. A map is actually fully playable with just this step, however you’ll be missing lighting and and optimisation if you were to stop here. That said; if you’re wanting to quickly test logic or geometry changes and don’t want to go through a full compiling process (which on larger maps can take some time on lower end PCs) then setting up a profile just to run a QBSP compile might be worth it to save some time.

VIS is the stage of compilation that calculates PVS (Potential Visible Set) data for the level (If you’ve ever built a map in Source, this is essentially VisLeaf) and its used by the engine to calculate which parts of the map should be visible to the player based on their location. In its simplest form, its optimising the map for the player by breaking it into chunks and calculating which chunk should be rendered at that time. This is the part of the compiling process that can take the longest depending on your CPU.

Light is often the last stage of the compiling process and it calculates lightmaps for the level using each light entity found in the bsp file.

With that out of the way, lets set up the Compiler:

  • Click “Run” from the top bar in Trenchbroom and select “Compile Map”
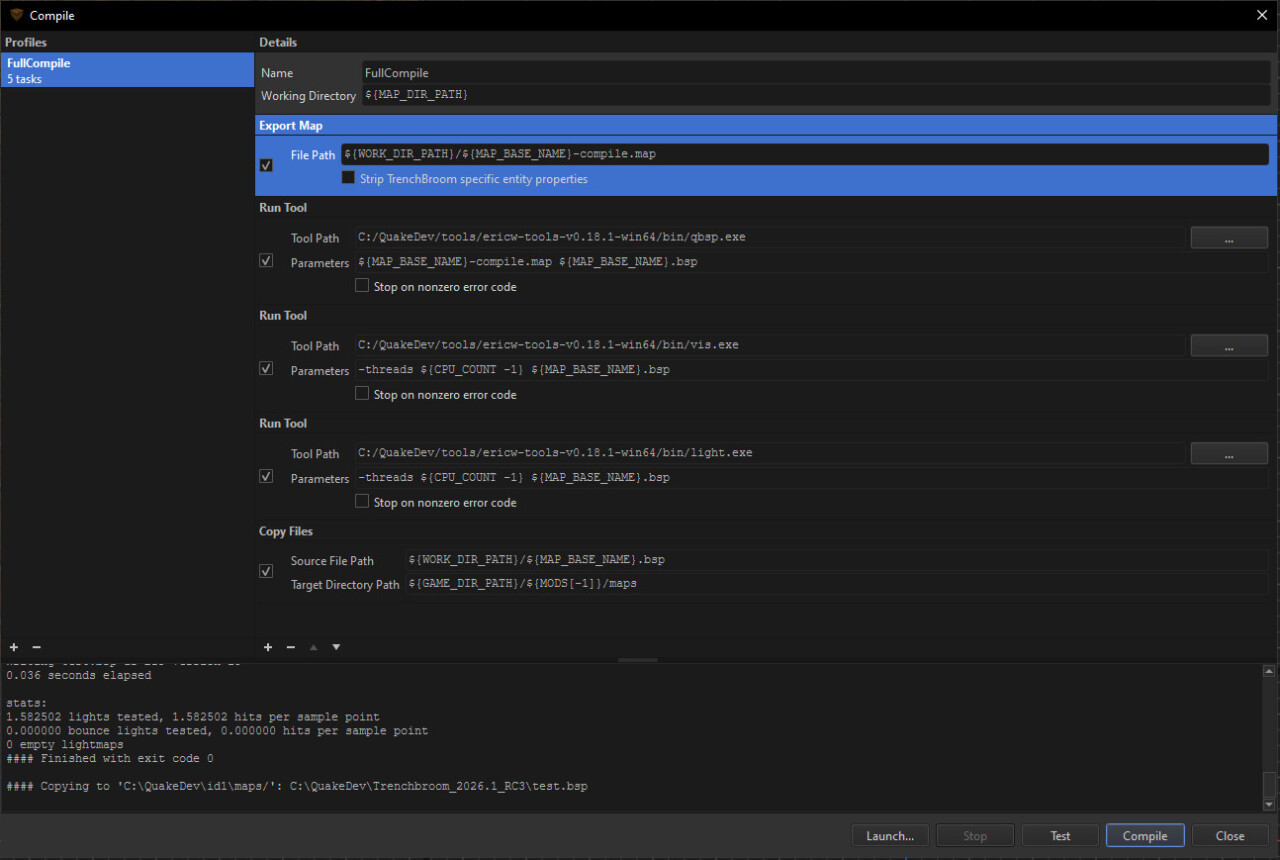
  • Add a new Compiler Profile and call it “FullCompile” (leave the working directory set to its default value of ${WORK_DIR_PATH})
  • Add the following tasks:
    • Export Map
    • Run Tool (this one is for QBSP)
    • Run Tool (this one is for Vis)
    • Run Tool (this one is for Lighting)
    • Copy Files


Parameters for each task are separated by a space, expressions are prefixed with a $. Additional information on compiler parameters can be found in the ericw-tools documentation and Trenchbroom Documentation. I will explain each task of the compile process and what each parameters mean, but if you just want to set the compiler up and get started, you can simply ignore the explanation and paste the parameters directly into the text box under each task.

Export Map

File Path: ${WORK_DIR_PATH}/${MAP_BASE_NAME}-compile.map

This task exports the map file to the File Path provided. If our map is called Map1, what this will do is write a copy of the Map file called “Map1-compile.map” to our working directory, which in our case is “QuakeDev/id1/maps”. Its not immediately clear as to why the documentation suggests we do this, I can only assume its to backup and protect the main map file during compilation, as this new “-compile” version of the map is the one that is read by the compiler in subsequent tasks.

  • ${WORK_DIR_PATH}/ – is a reference to the Working Directory of the map set in the Compiler profile. We left this as its default value which simply points to the folder which our map is saved in.
  • ${MAP_BASE_NAME}-compile.map – is what the new map will be called. In this case it references the name of our map and appends a suffix “-compile” to the end

Run Tool (QBSP)

Tool Path: C:/QuakeDev/tools/ericw-tools-v0.18.1-win64/bin/qbsp.exe

Parameters: ${MAP_BASE_NAME}-compile.map ${MAP_BASE_NAME}.bsp

This task runs the QBSP executable file in the ericw-tools folder, and writes the bsp data to a .bsp file. The two parameters needed for this task are:

  • ${MAP_BASE_NAME}-compile.map – the map file which will be read by the QBSP.exe
  • ${MAP_BASE_NAME}.bsp – the name of the bsp file that will the bsp data will be written to. In this case it’s just the name of the map

Run Tool (Vis)

Tool Path: C:/QuakeDev/tools/ericw-tools-v0.18.1-win64/bin/vis.exe

Parameters: -threads ${CPU_COUNT -1} ${MAP_BASE_NAME}.bsp

This task runs the Vis executable file in the ericw-tools folder, and writes the PVS data to a .bsp file. The two parameters needed for this task are:

  • -threads ${CPU_COUNT -1} – this parameter goes over my head as my knowledge of CPU cores and threads is almost non existent, but my understanding is that this is explicitly telling the CPU to use the maximum number, minus 1, of threads available during the vis compile.
  • ${MAP_BASE_NAME}.bsp – the name of the bsp file to write the PVS data to

Run Tool (Light)

Tool Path: C:/QuakeDev/tools/ericw-tools-v0.18.1-win64/bin/light.exe

Parameters: -threads ${CPU_COUNT -1} ${MAP_BASE_NAME}.bsp

This task runs the Light executable file in the ericw-tools folder, and writes the lightmap data to a .bsp file. The two parameters needed for this task are:

  • -threads ${CPU_COUNT -1} – see above
  • ${MAP_BASE_NAME}.bsp – the name of the bsp file to write the Lightmap data to

Copy Files

Source File Path ${WORK_DIR_PATH}/${MAP_BASE_NAME}.bsp

Target Directory Path: ${GAME_DIR_PATH}/${MODS[-1]}/maps

This task copies the bsp in the working directory to the maps directory within the last enabled mod. This is the file that will be read by Quakespasm to play the map. I actually am not entirely sure why this is needed (and why we can’t just run the bsp file from the working directory, but without this stage, you won’t be able to play your map from Trenchbroom, so its best to add it and not ask too many questions.

  • ${WORK_DIR_PATH}/${MAP_BASE_NAME}.bsp – the working directory of the map file
  • ${GAME_DIR_PATH}/${MODS[-1]}/maps – the maps folder in the last enabled mod of our game directory (in this case QuakeDev/id1/maps). $MODS[] is an array containing all enabled mods for the current map. I’m not entire sure I understand what’s going on here however.


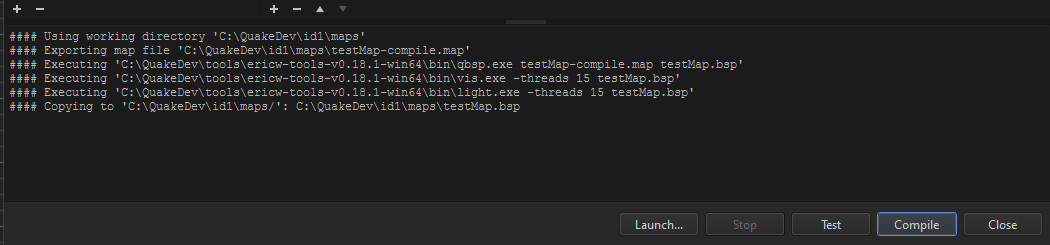
And that’s it, the compiler is set up. If you want to test and make sure everything works; save the current scene as something like “testMap” and click the Test button. A console log should be printed displaying the following:

Lets See It All Working

You’re done! Trenchbroom is ready to be used. It would be a shame however, not to end this post without seeing it all working and ensure our setup is correct. So lets make a very quick room, with some geometry, a player start, and a point light. Don’t worry about understanding any of this for now, as in the next post, I will walk you through the basics of mapping in Trenchbroom, including UI navigation, brush manipulation, texturing etc.

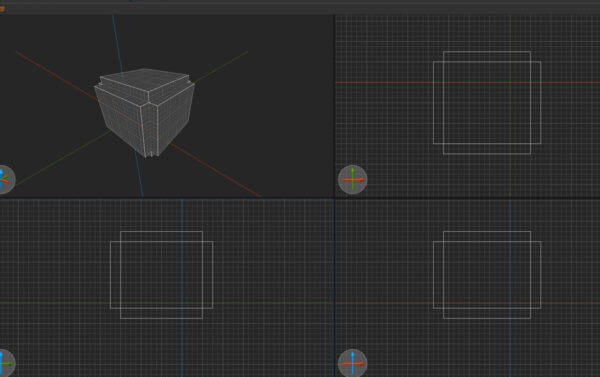
  • In the perspective 3D view, click on the cube and Hold the SHIFT key – this will enable brush manipulation
  • Hover over the sides and extend them out to make the brush a bit bigger (we will use this as a floor piece)


  • With the brush still selected, press CTRL+D to duplicate it
  • In an orthographic view, click and drag the new brush to the side
  • Resize the brush to create a wall


  • Duplicate the wall brush 3 more times to create 4 walls surrounding the floor piece
  • Duplicate the Floor and move it up to create a roof piece and seal the room (its important that the whole room is sealed, as gaps into the void will create leaks and the map won’t compile correctly)


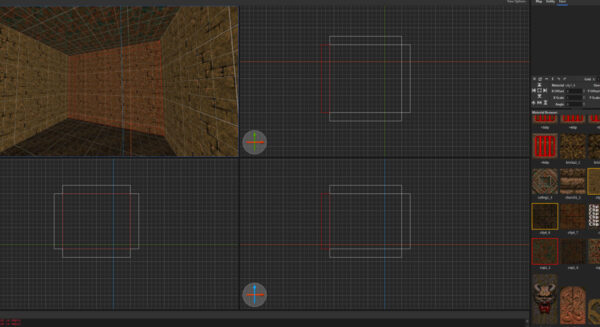
  • Inside of the room we have just created, select the four walls
  • Navigate to the “Face Tab” in the top right and select a texture to apply to them (I went with city1_4)
  • Apply a different texture to the floor brush and a third texture to the ceiling


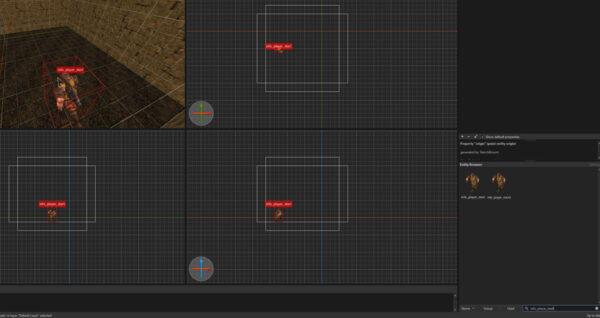
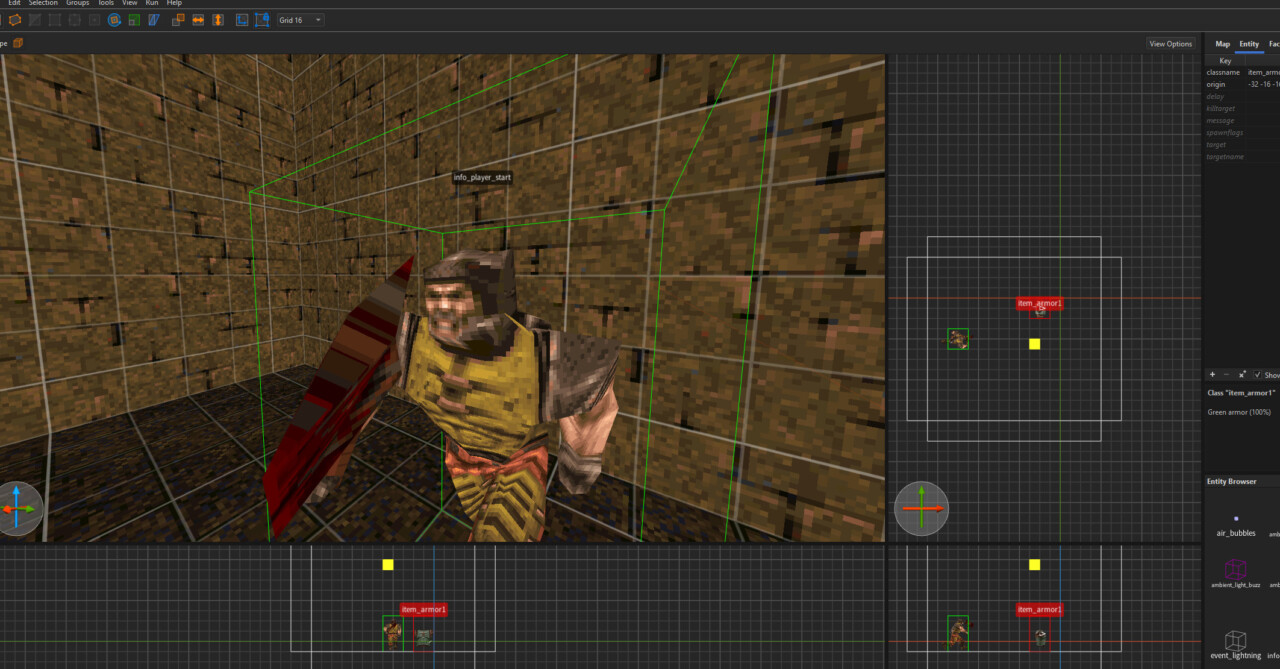
  • Navigate back to the “Entity Tab” and using the Entity Browser search bar in the bottom right; search for “info_player_start”
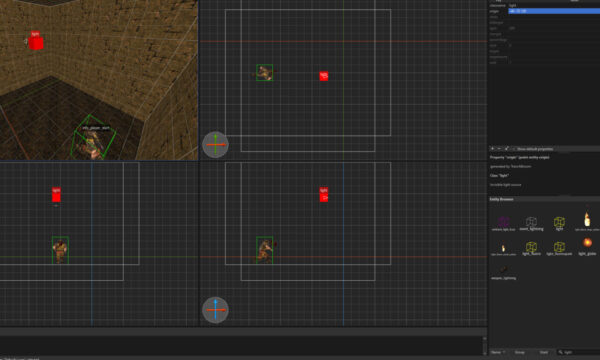
  • Click and drag the entity into the world (this will be the spawn point for the player)


  • Search the Entity Browser for “light” and drag it into the scene

  • Save the map, Select Run from the top bar and then select Compile
  • Compile the map
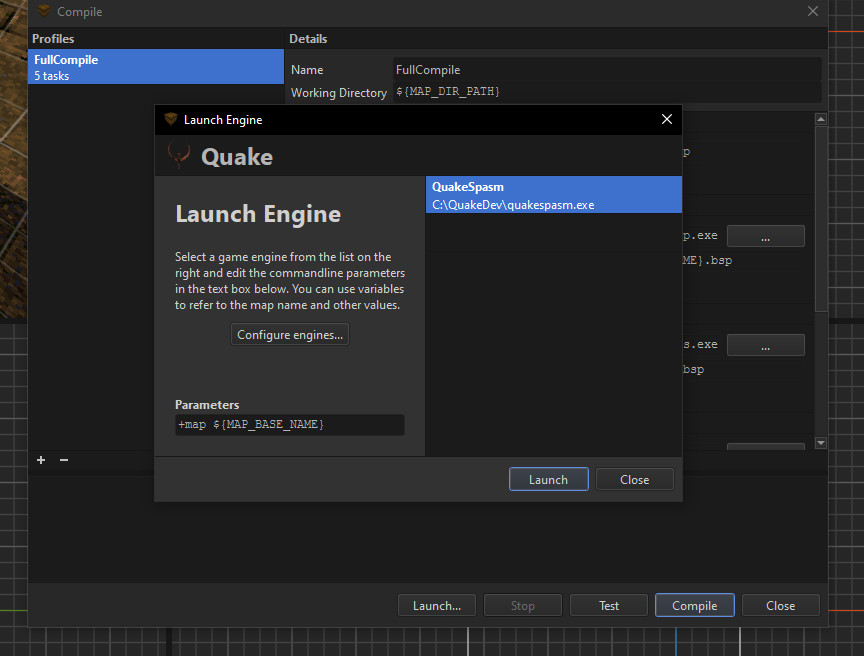
  • Select “Launch”
  • Select your QuakeSpasm launch profile and in the “Parameters” add “+map ${MAP_BASE_NAME}”

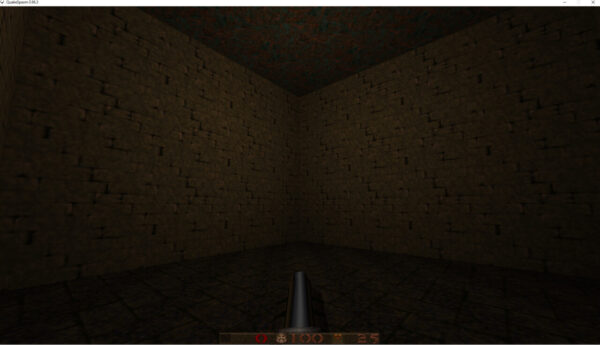
This will load the map you have just compiled by default. Press launch and see your very basic room in engine!

And there you have it! A functioning Trenchbroom to start mapping in! Next post I will be going into more detail as to how to use Trenchbroom and become more proficient with the tools.

Game Jams 2017-2022

Introduction

As mentioned in the Projects From The Vault blog post, this will be a trip down memory lane and a dive into the past decade of all the game jam projects I have been a part of. Through 2017 to 2020 I was on an absolute tear! I consistently attended The University Of Abertay’s Global Game Jam site and worked with the same 3 amazing developers to produce “games”, that looking back on now, I feel rather proud of. If we’re being honest here, these aren’t ‘amazing’ games (they closer resembled the nightly visits from the Benadryl hat man who frequents my flat) but they were conceived and completed within the jam deadline, and honestly I think that alone deserves a pat on the back and a victory pint. In the end, it was the journey that mattered, and not necessarily the destination.

Post 2020, I wasn’t living in Scotland any more and with my team members committing more time to organising and supervising the Jam, and less time participating, the Global Graham Jam (yes that was our team name), hung up its gloves and faded into distant memory. This was when I shifted to participating in Ludum Dare, a remote game jam held multiple times a year. These Ludum entries were far less successful.

It turns out making something as a solo developer proved a far greater challenge than making something as a team (especially due to my limited programming experience). But I tried my best and had fun in the process which is ultimately what counts. All projects are still displayed on their respective Jam websites, however whether they are worth a download and a play, is another matter entirely.

Note: At the time of publishing this post, the Global Game Jam website appears to be down. Thus, none of the links to Global Game Jam projects will work.

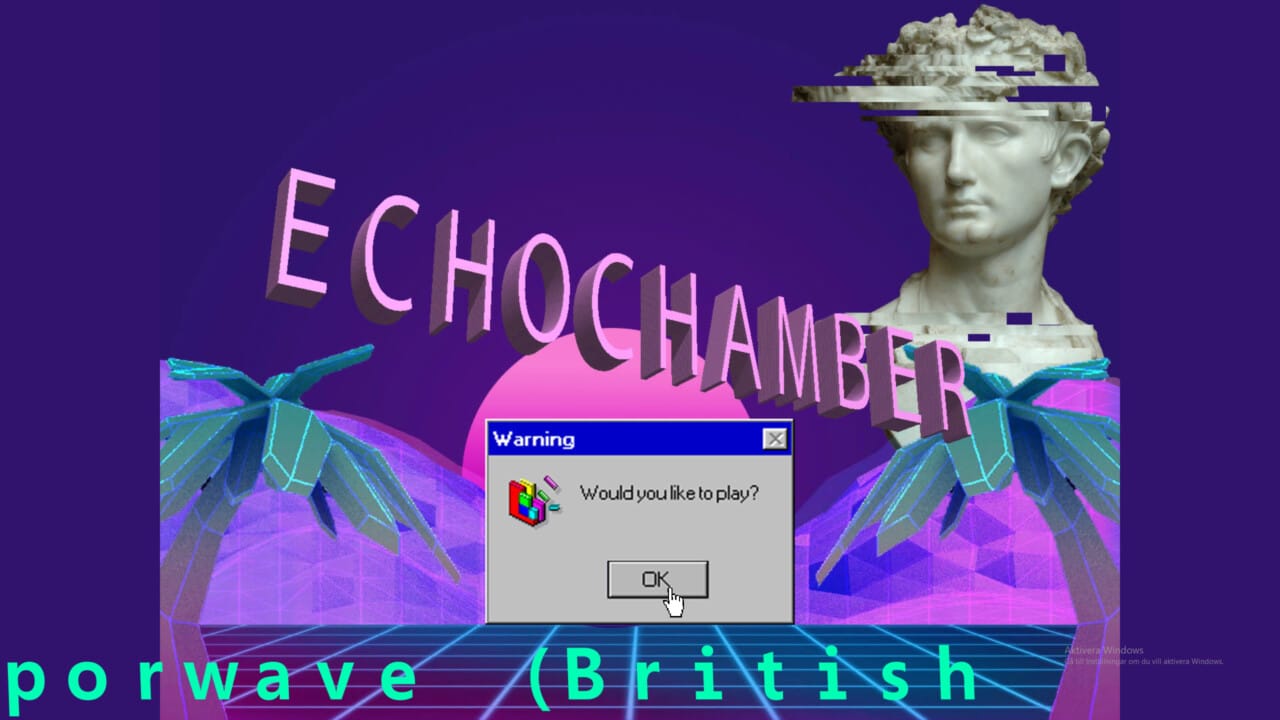
ECHOCHAMBER

2017 where it all began. Of all the game jam events we did, I seem to remember this one the most. which is strange because I think this was the one I was most sleep deprived for. I had joked previously in 2016 that I was going to enter the Global Game Jam and make a game based around finger puppets holding a séance (the plan was that I would fit the theme around it when it was made public). I would ultimately not compete that year due to reasons I cannot remember, but found it hilarious that the theme was revealed to be “Rituals” (this would ultimately start the trend of me correctly guessing the Global Game Jam theme each year prior to the event).

In 2017 however, I was determined to jam, and I wanted to make a vapourwave game (again, like a child determined to force the square block into the triangle hole, I was going to make this idea work with the theme). I remember missing the start of the jam because I was in Glasgow seeing a show. Midway through the set however, I get a message informing me that the theme was “Wave”! (It should be noted, I never correctly guessed the theme again, making this trend extremely short lived).

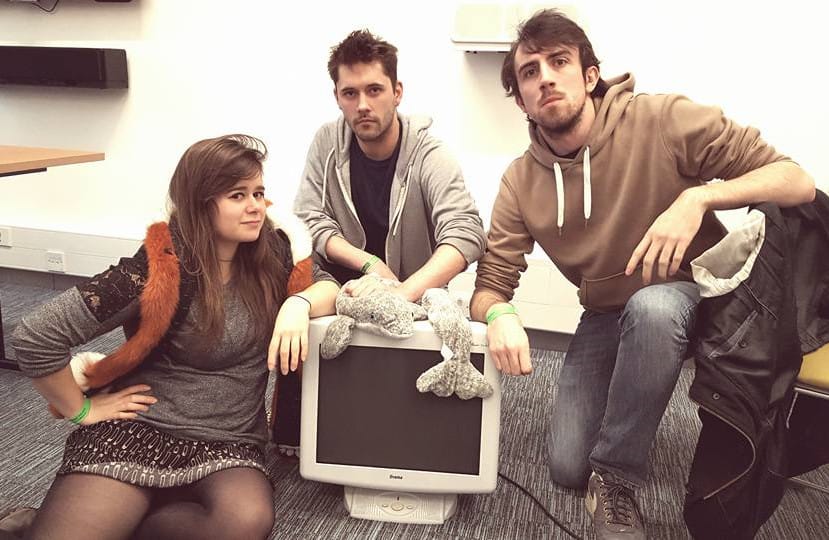
I had done weekend jams before, so this wasn’t a new experience for me, but what was new, was that it was done in the university surrounded by hundreds of students all working on their own projects. This was a great atmosphere as it really did feel like we were “all in it together”. I feel like you don’t get this same experience working alone in a bedroom. Sure you can join discords with people posting their work or track updates via hashtags on a twitter feed, but its not the same as getting up from your desk to take a break, stretching your legs with a bit of a walk, and chatting with other developers as they gush over the latest thing they’ve just implemented into their build (It almost never actually works when they try to show you, but the enthusiasm is contagious). If you’ve never participated at an “on site” game jam, I highly recommend it.

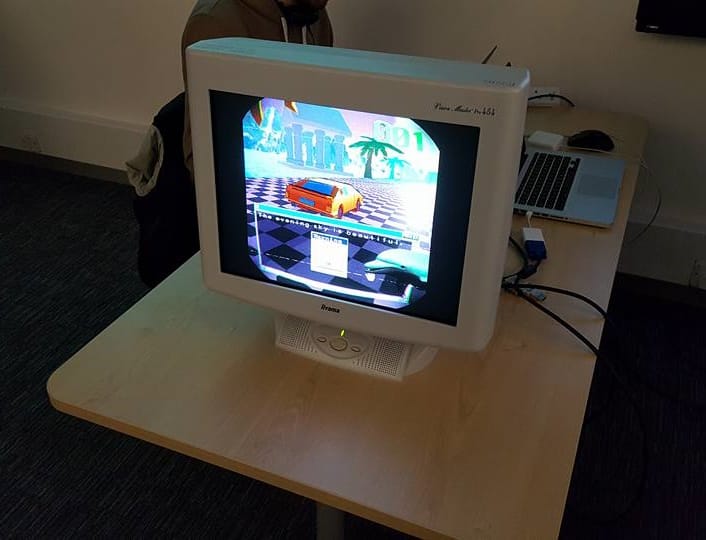
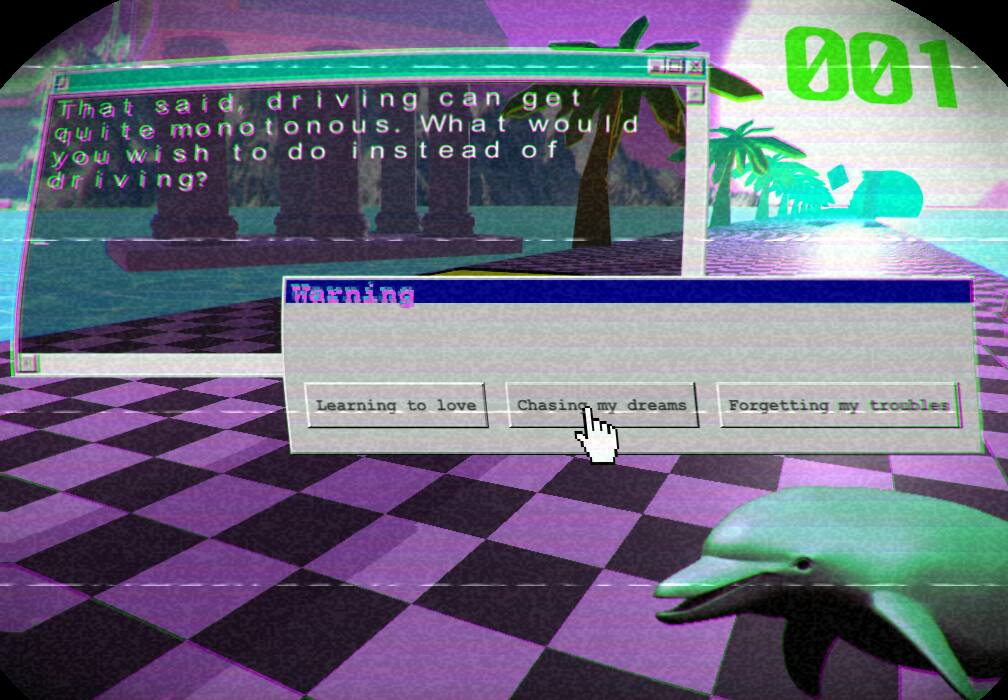
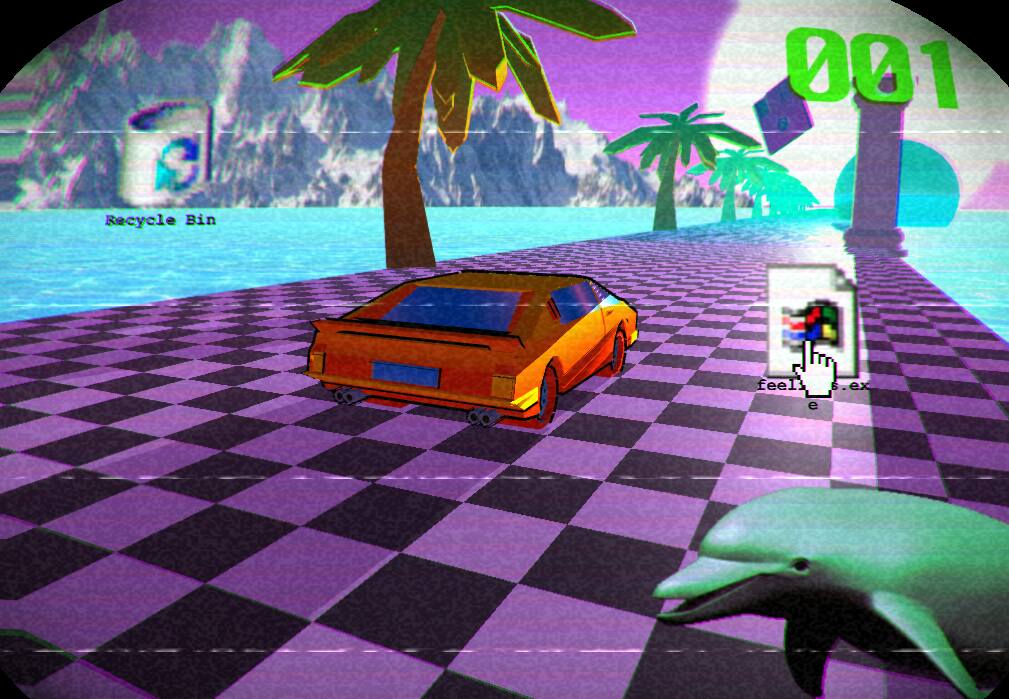
ECHOCHAMBER wasn’t so much of a game, as it was an… experience? The closest I can get to describing it was as an interactive novel, or maybe a point and click adventure game. You press forward to make the car and drive and simply answer questions from Caesar (your Dolphin passenger) who starts spouting philosophical texts we found on Tumblr at 2am. The design process would consist of someone on the team saying “oh that’s a fun idea” and then it just got added. There wasn’t a long term plan or even a design really.

It was simply “what is cool and weird and how do we fit it into the framework of the game?”. This sort of manic approach to Game Development was pretty fluid and liberating, and really lead to some genuinely creative ideas. There was probably a fun game hidden under all the memes and meta humour that we could have finished, but as with the 72 hour Mapping Jams, you really do lose a lot of the momentum on a project once the jam has officially ended. In a way, I’m actually glad that we never worked on it further. The project remains a self contained entity, locked into that special weekend in 2017. A project conceived, made and ultimately finished, cemented in history. Its special to me, and had we dug it up months later and continued working on it, changing it into something it was never intended to be, it would have felt wrong. Sometimes its enough to simply make something and then let it go.

You can still play ECHOCHAMBER to this day as the executable file can be downloaded from the Global Game Jam website.

Local Radio DJ Simulator Hero 2

The following year, the team returned to work on our second Global Game Jam game “Local Radio DJ Simulator Hero 2″, only this time, we had a new member. (I should probably take this moment to mention Gaz, Kayleigh and Robin; the other three members to make up The Global Graham Jam, who without, I would not be writing this Blog post. We had all worked together on Glitchspace prior to this, and it was a pleasure working with them again on these four Global Game Jams).

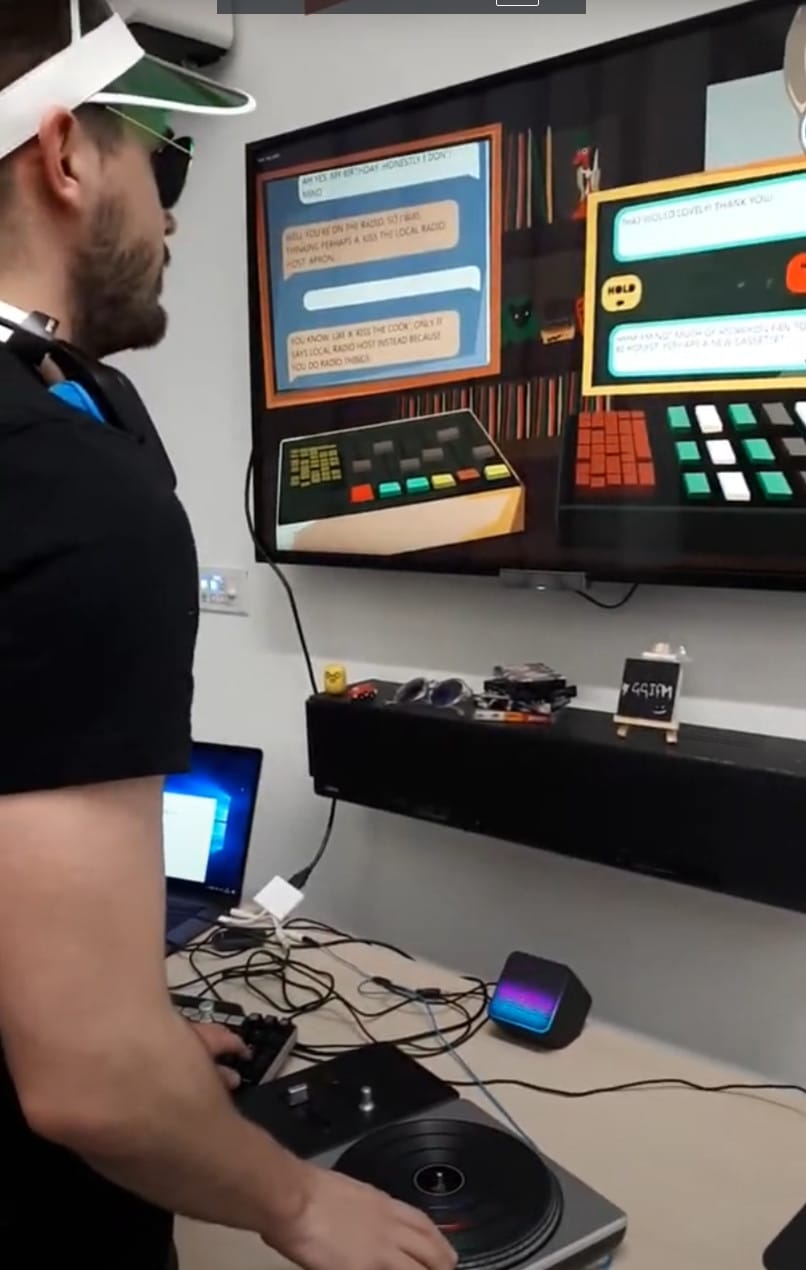
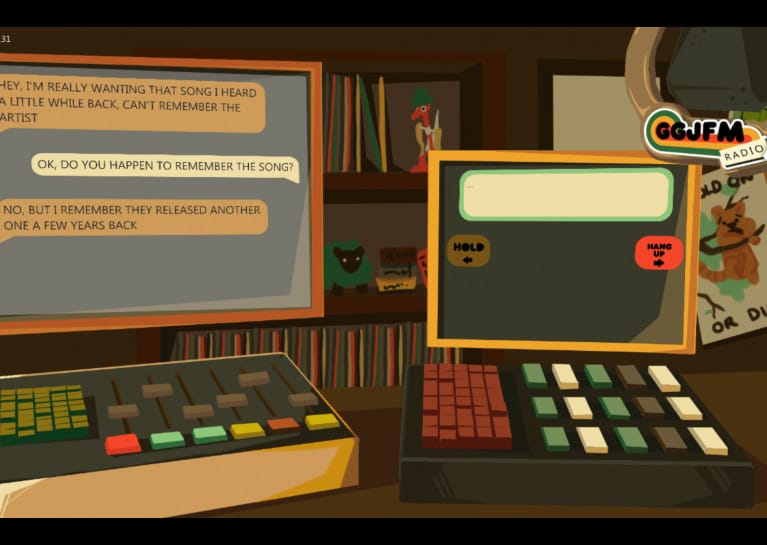
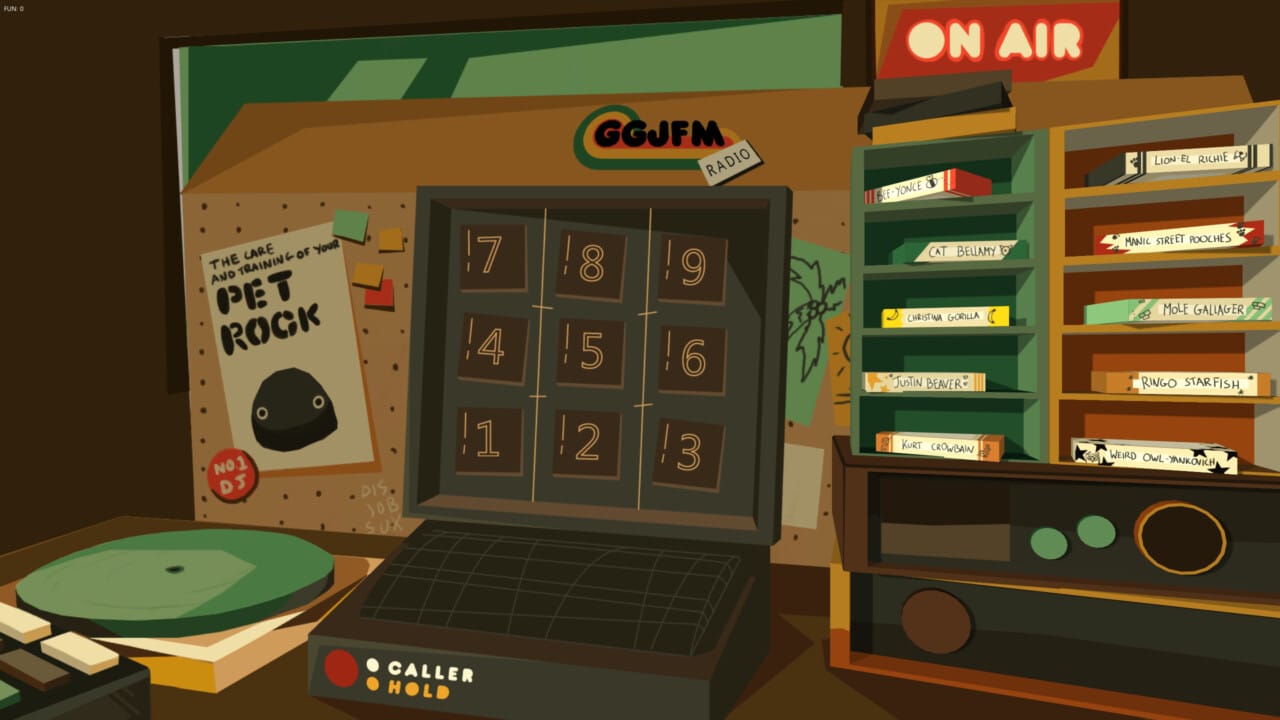
The theme of this year was “Transmission”, and we were pretty convinced on building something using the XBOX 360 DJ Hero controller that Gaz had brought in before the opening ceremony. Taking the original purpose of this peripheral literally, we ended up making a game where you played the role of a Radio DJ, who flicked between taking calls from various listeners and playing the songs that they requested. In a similar vein to ECHOCHAMBER, the game was essentially an interactive novel, with minor “gameplay” mechanics; the key one being to decipher what song the caller actually wanted to hear as they never gave you the name specifically, but rather a description of the song itself. “I want to hear a song, that a man dying from thirst in the desert would want to hear” the caller would yell, as I manically rummage through the music collection in search of the Wonderwall cassette.

The songs themselves were MIDI renditions of famous club bangers from the 80s, 90s and 2000s, each with an animal pun slipped into their title (it gave us all a good chuckle and kept the copyright lawyers happy).

The DJ Hero controller could be used to scrub back and forth through the song, adjust the tempo and pitch, and it even had button with the sole purpose to spam an airhorn sound effect when mashed by the player. I should note that these were purely aesthetic, but I could definitely see them being expanded into actual gameplay mechanics; i.e. a listener telling the player that they have a job interview in 1 minute and must listen to a full song by Kurt Crowbain if they are to ever be successful in getting the job.

As a game, this definitely had some potential. Revisiting it today, I could see it fitting into the same corner of the market as games such as “Paper’s Please” and “Not Tonight”…

“Local DJ Hero – a radio DJ desperate to keep ratings high during the graveyard shift at a failing Local Radio Station, takes calls, plays the hits and gives regular traffic updates, all in an attempt to keep the station and their career alive”. (I think I had just finished reading Alan Partridge’s second book ‘Nomad’, before the game jam, which might have been why I leant so hard on the Local Radio DJ theme).

It “could” work with a bit of a redesign. Much like ECHOCHAMBER, you can still download this executable from the Global Game Jam Site, however its seems unplayable. You actually need a DJ Hero Controller to even start the game; I couldn’t get passed the title screen on my build (but could get an extremely loud “YEAH BOI” by pressing 2 on the keyboard which kept me entertained for a couple of minutes). And whilst we could change it to function solely with a keyboard setup, I really do feel like it loses a lot of the charm without the DJ deck. It was definitely one of those “you had to be there” kind of games. At least I still have a midi download of Gasolina saved on my HDD to remind me of the weekend.

What Does Home Mean To You, Graham? 3

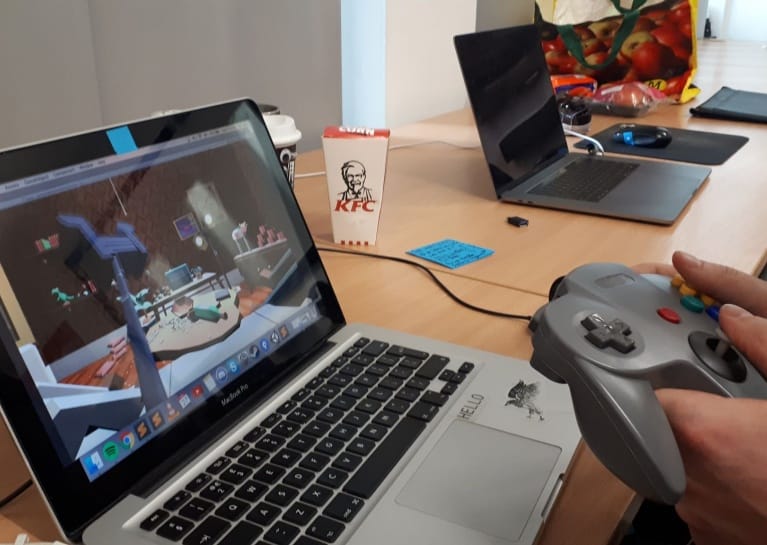
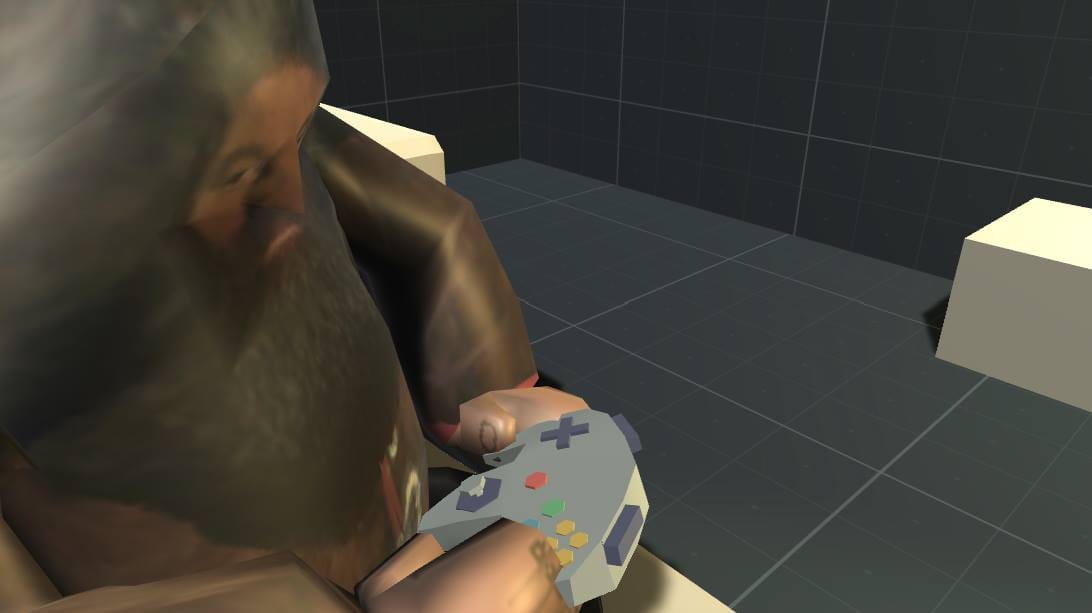
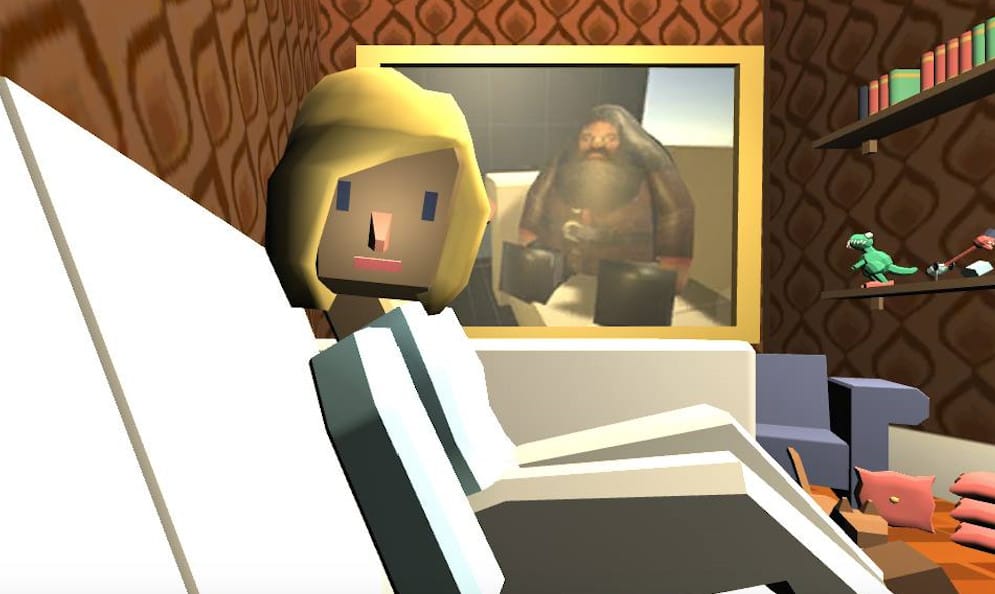
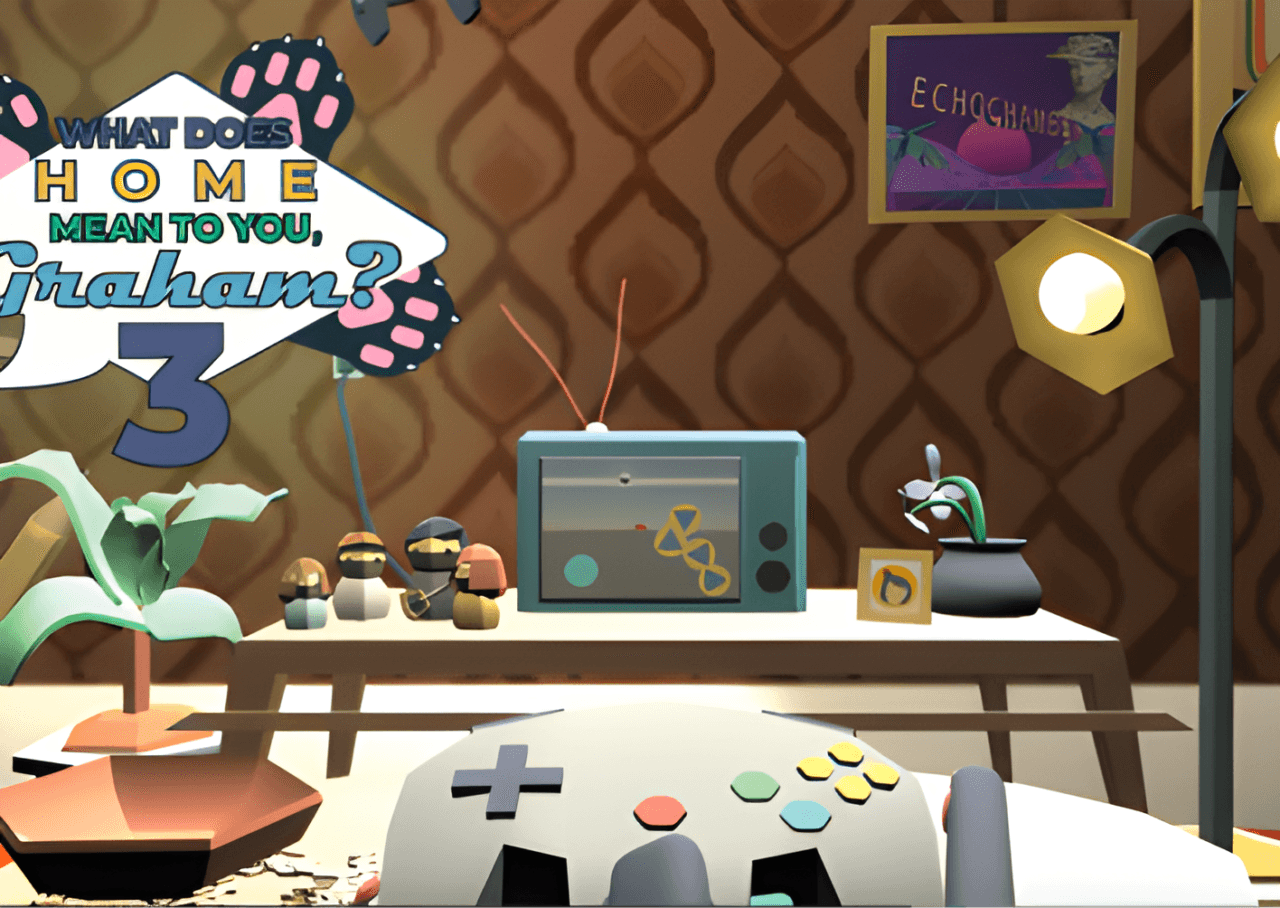
What Does Home Mean To You Graham? (full name: “What Does Home Mean To You, Graham? 3, the sequel to: Local Radio DJ Simulator Hero 2, the sequel to: EchoChamber” – this joke got old by our third entry and was subsequently dropped in 2020), was the third Global Game Jam entry by the team. This is where the jams all begin to merge into one for me. I don’t actually remember all that much about the jam itself other than it being developed to use an N64 USB controller I had purchased and that PS1 Hagrid was used in the initial development of it (a trend I would continue on for jams in the future).

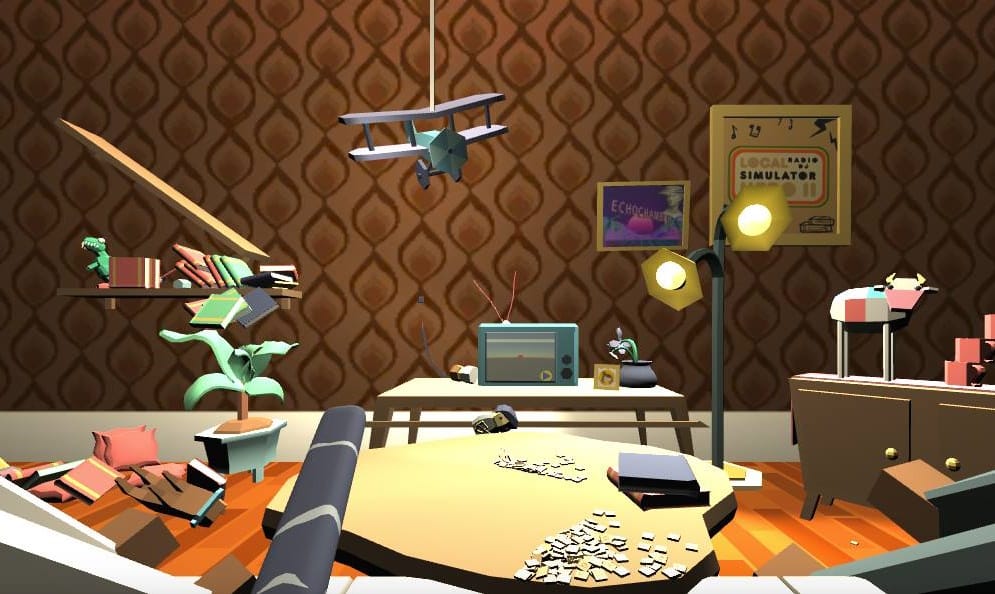
I do remember the game pretty vividly however. The player is stuck to the couch and is asked to find and obtain certain items from within the room by their parents. Essentially a scavenger hunt, except they can’t move. Instead they extend out their paw (I should mention, the player character is a cat for some reason) and grab the item they have been requested to obtain. They then retract the paw holding the item and earn points by give it to their parents. Simple…

Except every item in the scene is a physics object. Absolute chaos would unfold as you extend your paw to grab the plant at the back of the room, but accidentally nudge the bookshelf, causing it to collapse onto the dining table, which in turn would flip the jigsaw. A domino effect that creates a completely un-navigable room of mess… And then your parents would ask you to fetch the coffee pot, completely un-phased by the carnage you had just witnessed. There was also a little DDR game you could play on the TV, which I don’t ever remember us implementing but it’s cute that it’s there.

This was probably the most “game” game jam entry we ever worked on and I could definitely see it being developed into a small multiplayer party game. All players fighting each over a single specific scrabble letter from a bowl of scrabble pieces that ultimately ends up on the floor.

Only a MacOX build can be downloaded from the Global Game Jam Site, and as my Macbook recently decided to throw a tantrum and no longer turns on, I was unable to boot this bad boy back up and try it out (which is a shame).

RepAir

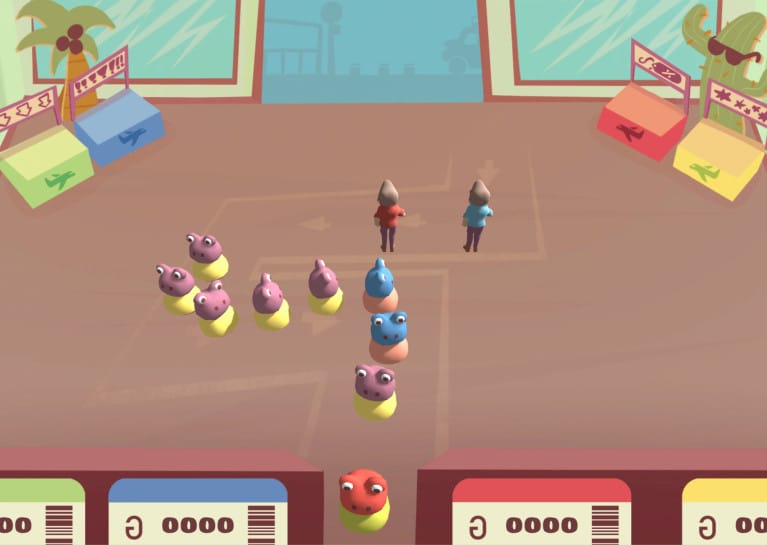
2020 was certainly a year. The disruption to my life and my daily routine caused by COVID meant that I often struggle to remember specific details of what happened throughout the year and this Global Game Jam is no exception. I just cannot remember anything about this game. I recognise the screenshots, but I cannot remember the theme*, the mechanics, or even making the thing.

(*As I was re-reading what I had written, I actually remember the theme being “Repair”, hence the name RepAir, which was HILARIOUS at 4am when it was conceived.)

I do remember that it was a slightly more stressful jam with the team’s responsibilities being split between needing to organise and run the jam itself whilst also working on our own entry. I had also moved down to Cambridge at that point so coming back up to Dundee for a weekend of jamming and then immediately returning home for a week of work was a lot more taxing on my body.

There’s surprisingly few images of the game on the Jam page, absolutely no social media posts made about it and furthermore, there isn’t even an executable file uploaded to the submission. Its weirdly eerie to think that we made this game, yet there appears so little proof of its existence.

Rereading the description of the game, players are required to approach customers in a queue at the airport and provide them with tickets that meet their needs for the best price they can afford whilst still making a profit. Not much I can really say about this one, other than I wish I had taken a few more pictures of the jam to prove to my future self that this wasn’t all just a dream.

After 2020, I never returned to Abertay’s Global Gam Jam. It went digital for 2021 (and maybe 2022.. I can’t quite remember) and when it came back to being an in person event, I just never found a good opportunity to return. Also the team had greater responsibilities surrounding the organisation of the event, so it was getting harder to produce something complete each year.

Instead my focus shifted to Ludum Dare. A completely online game jam that takes place multiple times throughout the year. Themes are voted for by the public, and entries are played and rated by teams after the end of the jam. The more games you play and rate, the more exposure your game gets on the site. I’d attempt 5 Ludum Dare entries over the next 3 years, but would only actually submit 2 of them.

Baby On Board

The first entry came about mid 2020 during the COVID lock down called Baby on Board built in Gmod. Ever since my time working at Junkfish, I had been fascinated by Gmod as a game making tool.

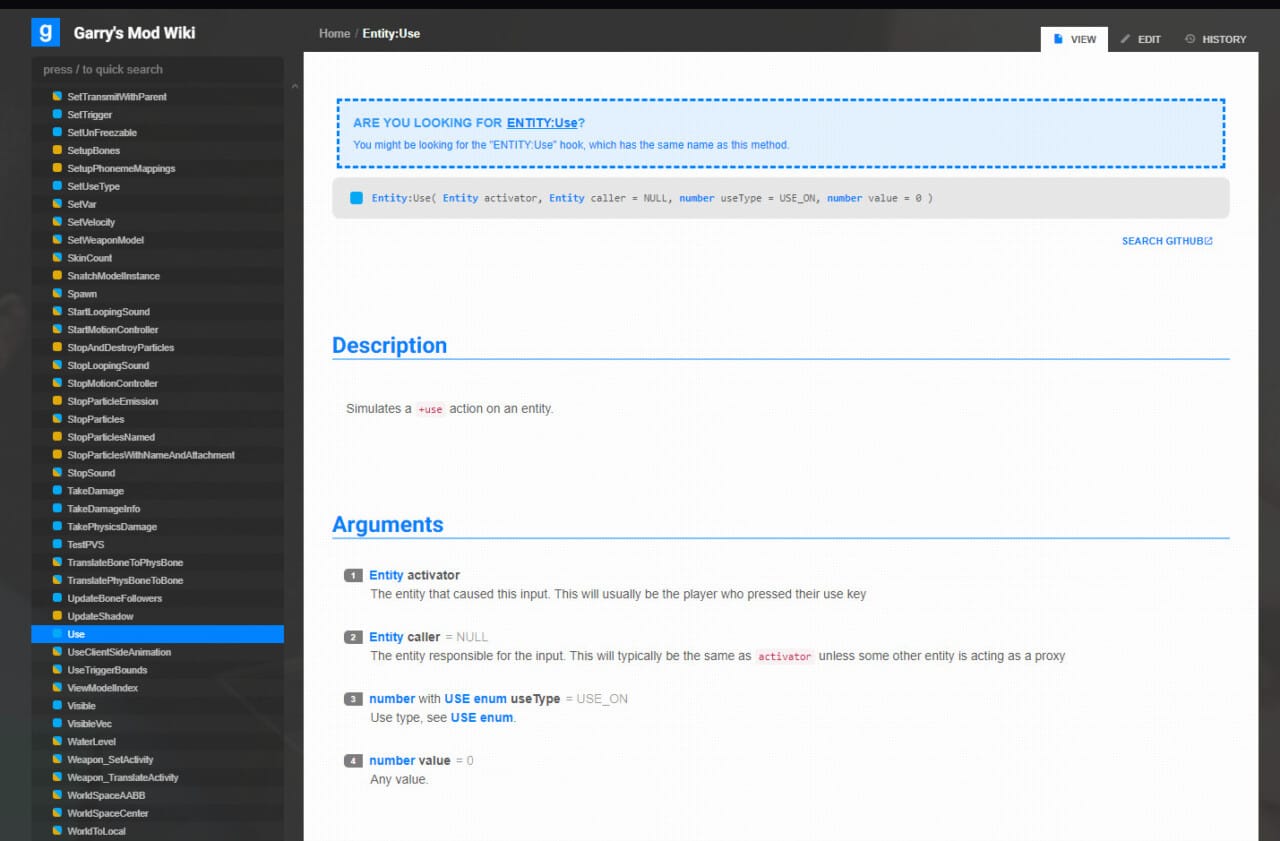
It was built in the Source engine with an extremely well documented LUA scripting tool layered on top. All the networking code came ready out of the box allowing a multiplayer game to be build with minimal networking knowledge required. I had previously learned how to work in Gmod, using it for a Junkfish prototype years ago. So figured it would be cool to return to it and make something for Ludum Dare.

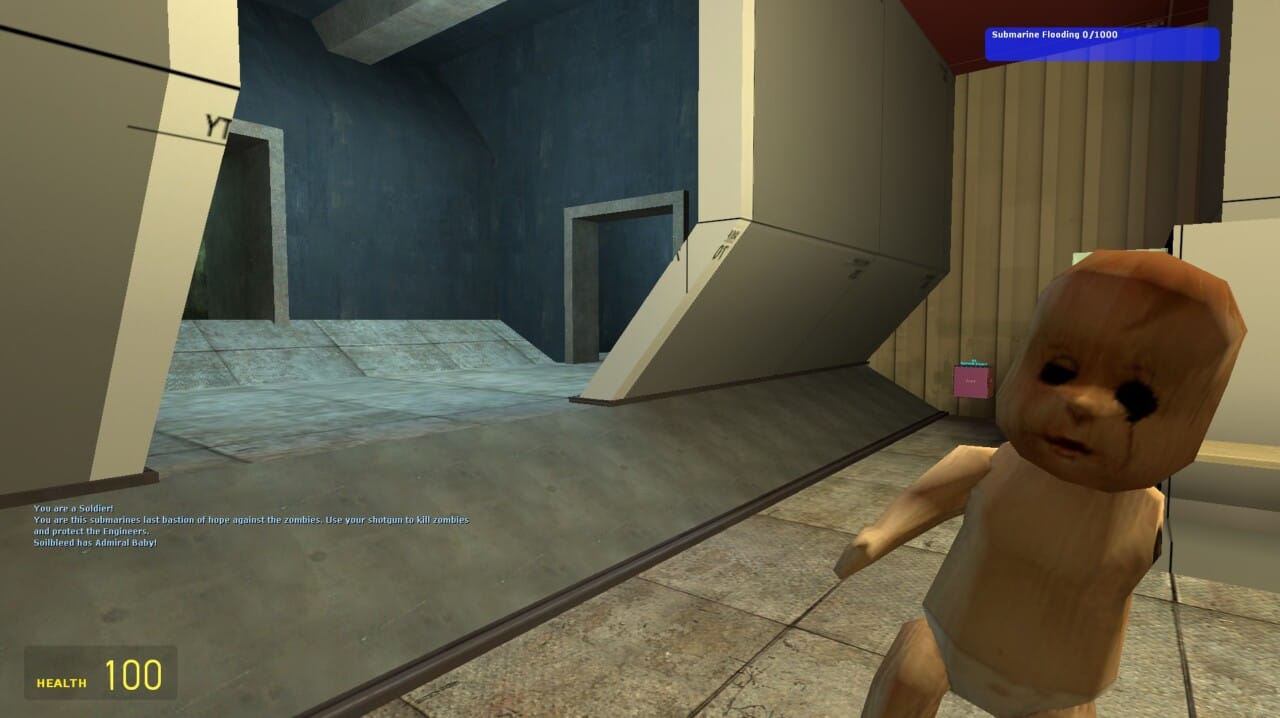
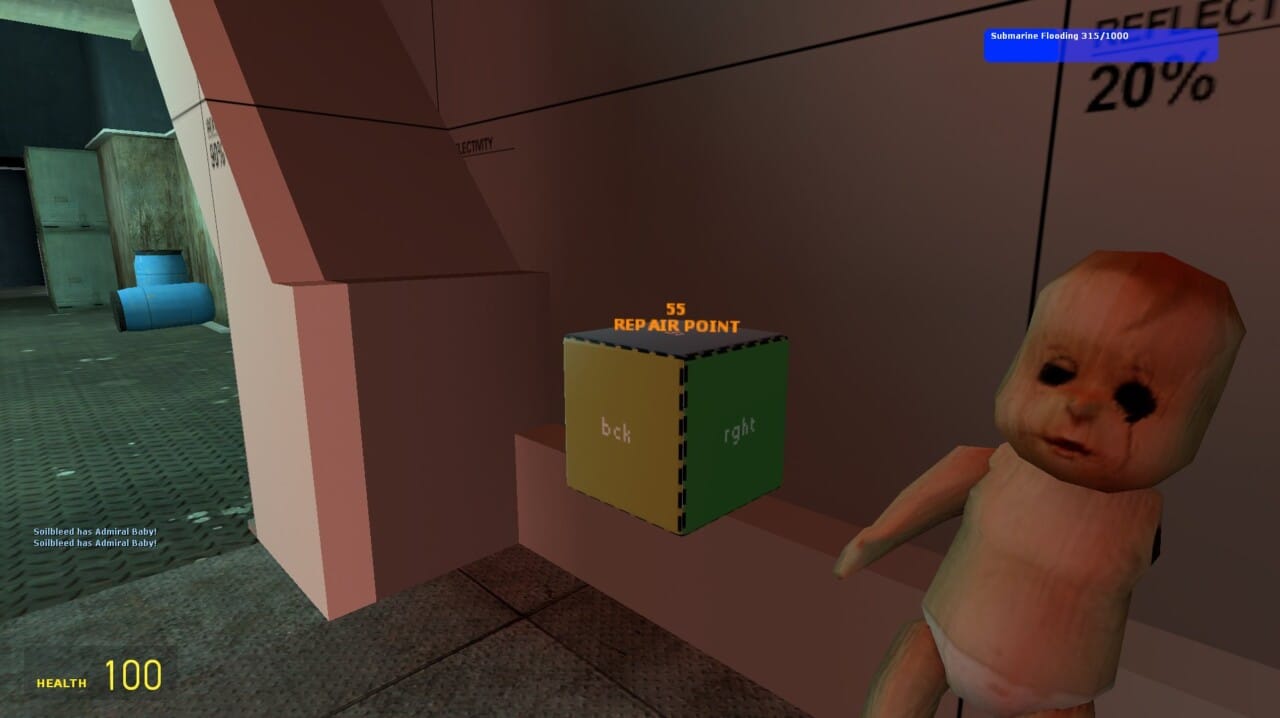
I teamed up with another developer and we set about building a multiplayer game mode around the theme of “Keep It Alive”. A team of players were tasked with keeping a sinking submarine afloat, fixing holes in the ship, shooting HL2 zombies (it is Gmod after all) and ensuring the Admiral (who had been turned into a baby doll… for some reason) doesn’t drown.

I’ll be honest with you, this thing was barely functional as a game and I’m actually surprised it received the minimum 20 required votes to get officially placed. The barriers of entry to this thing were insane; To actually play it, you needed to:

> Manually place files into different Steam folders
> Own a copy of Gmod
> Set up the game mode within Gmod

And to top it all off, you needed 3 other players to all do the same in order to play (all of which had to add the hosting player on Steam). We optimistically set up a Discord channel to try and organise gaming sessions but sadly (and understandably), no one joined. The Discord server doesn’t appear to exist any more which is a little sad. It amused me to think that someone might stumble across our entry years from now and click the link hoping to find a thriving community of “Baby On Board” players.

The game itself also wasn’t really complete, with a lot of the mechanics barely functioning as intended. This project definitely needed some more time in the oven and I can only assume the 24 people that gave it an average “fun” rating of 2.976 were doing so out of kindness or because of the novelty factor. If you, for some reason, feel compelled to play a half baked Gmod game mode, you can find all the necessary files for it on the Ludum Dare submission page.

The Rubeus Cradle

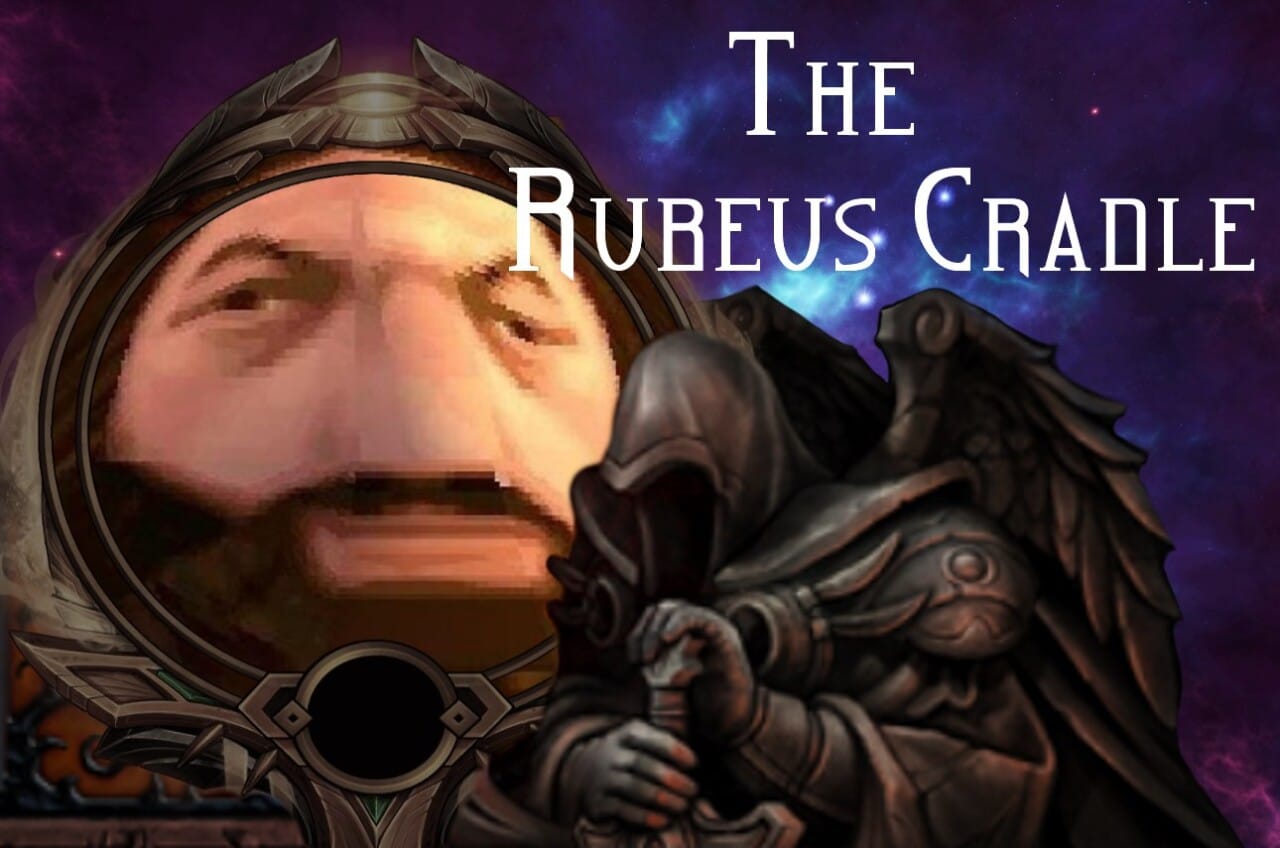
The Rubeus Cradle was the first game jam attempt done entirely on my own. Having polished up on my Blueprint knowledge prior to the weekend I was ready to dive head first into the shallow end.

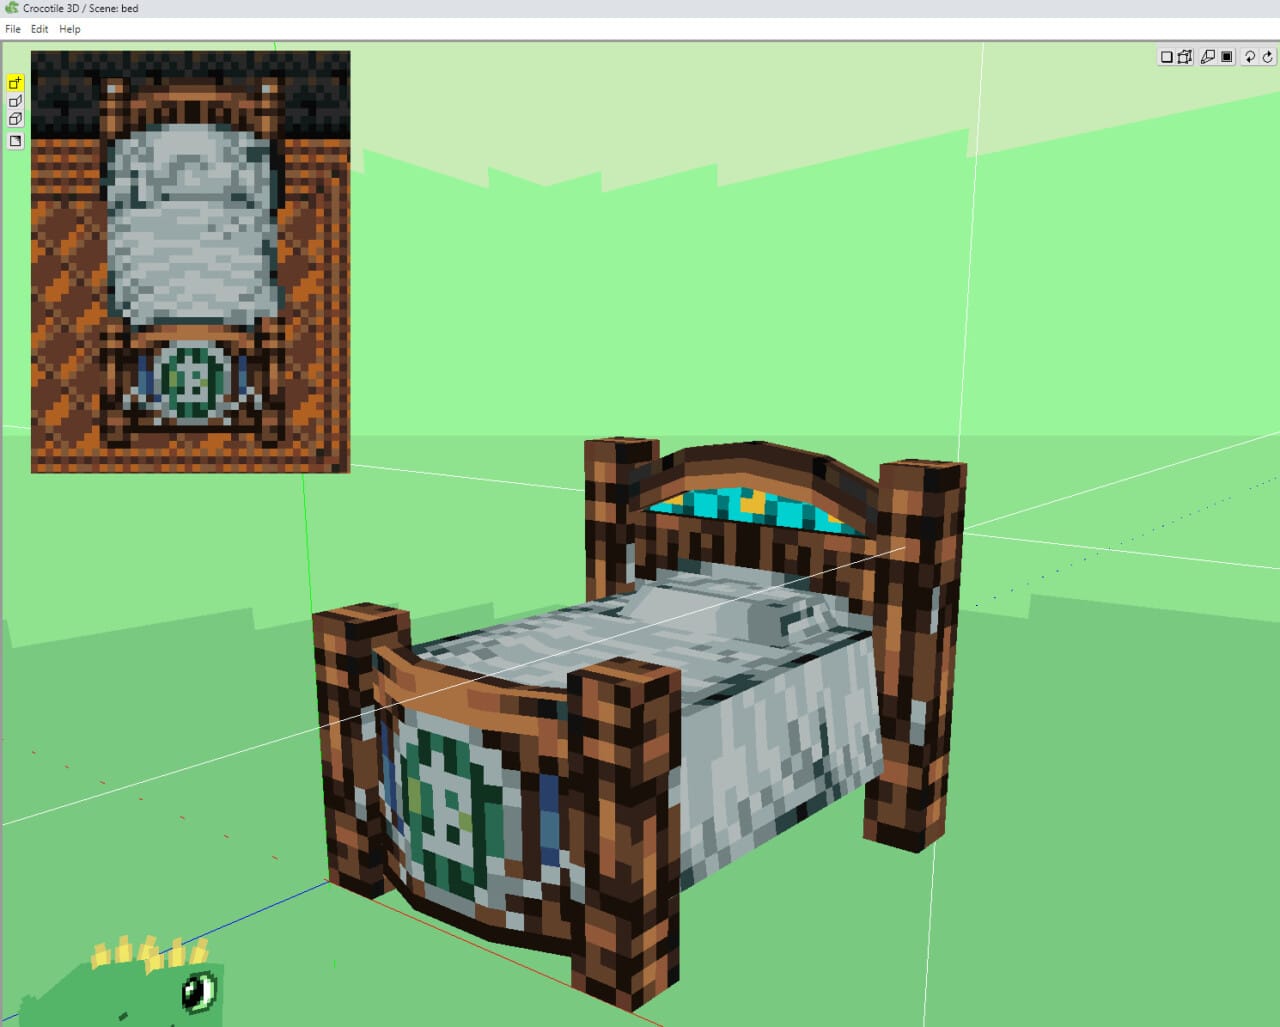
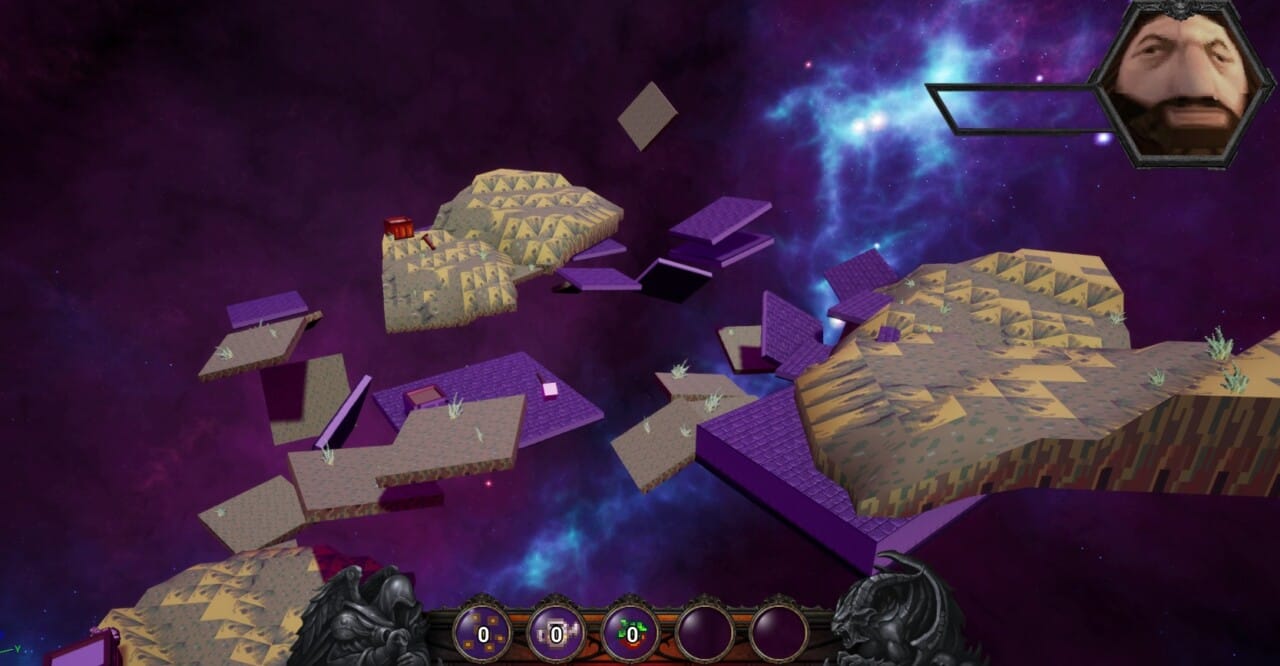
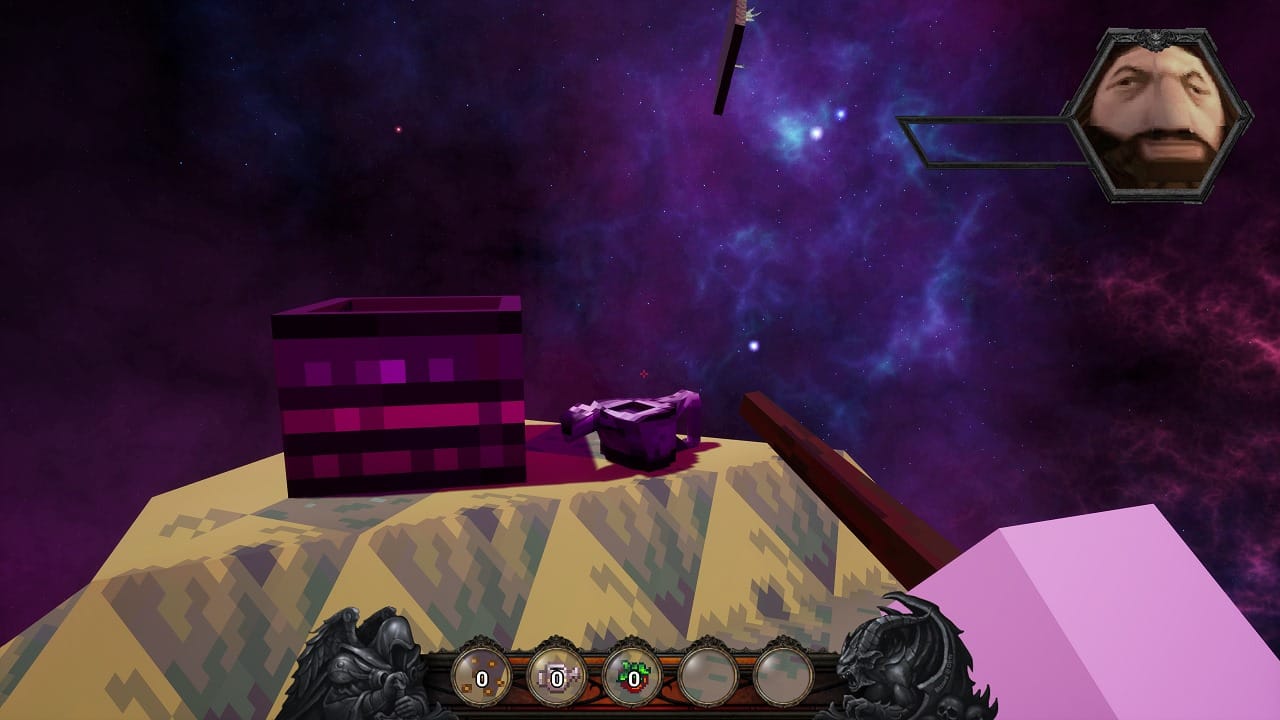
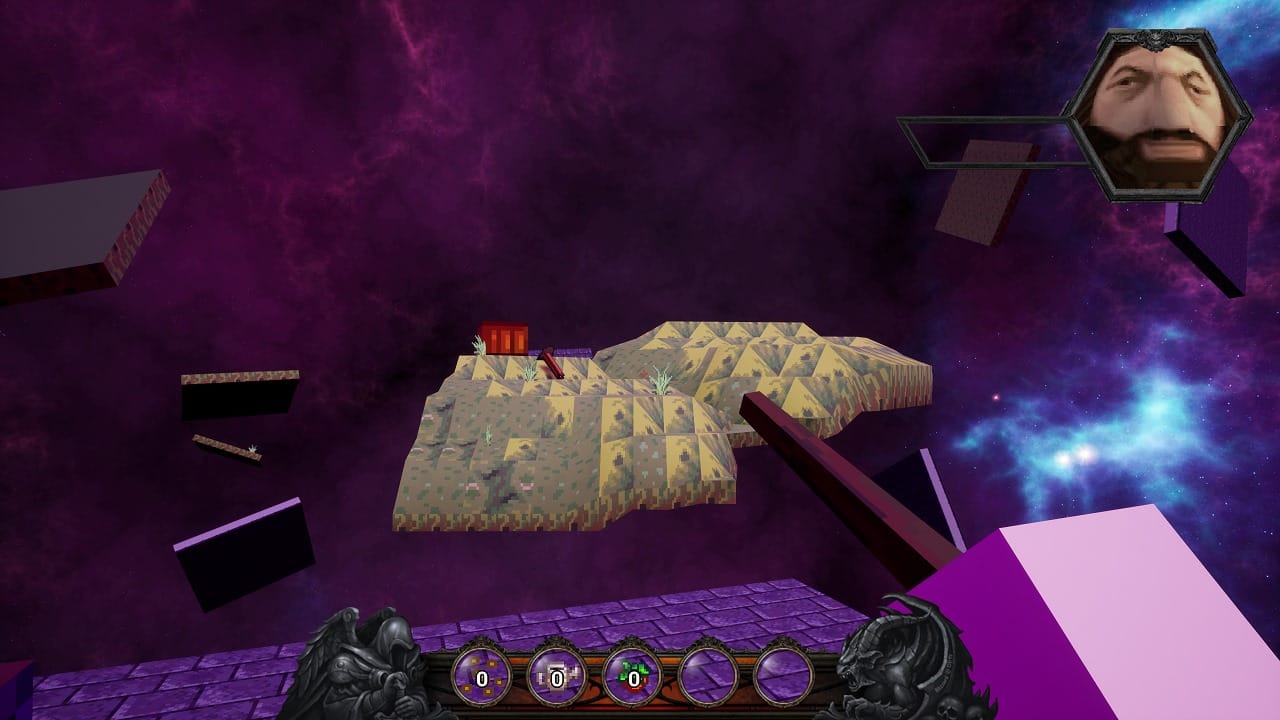
I had done little bit of prep work prior to the jam so I wasn’t going in too unprepared; There was a 3D modelling package call Crocotile3D, which took sprite sheets and gave you a relatively usable interface to build them into primitive 3D models. I had tested this out prior, and had surprisingly good results. PS1 Hagrid also made his return, but would ultimately be relegated to a 2D character portrait in the top right. The theme was announced at 11pm as “Unstable” and my mind initially went to an “unstable world”.

I remember spending an embarrassing long amount of time on the first evening just getting a bunch of random geometry to spawn into the level and then awkwardly float away from the player. The blueprints weren’t pretty, and the execution was laughably amateur, but I found myself incredibly proud at 6am, when it all suddenly began to work and I could put away the bottle of wine that had kept me company for the evening, and get some well deserved sleep.

In The Rubeus Cradle, the player took on the role of PS1 Hagrid as he jumped around this strange cosmic environment, collecting seeds, planting them into dirt patches, watering them and ultimately harvesting the berries once they were fully grown. Think of all the tedious resource gathering you do when farming in Minecraft but with none of the crafting that completes the loop and makes the whole process feel satisfying. There were 4 solid islands the player could jump to in order to gather the require tools; Water had to be filled from the well, the hoe needed to be collected to till the land etc. Only one tool could be carried at one time, so you had to keep track of where you left everything.

Between each of these 4 islands, there was 20 unstable platforms that would float and rotate aimless in the abyss. The player could use their wand to pull the platforms towards them and right-clicking on the mouse would lock them temporarily in place. This made the platforms walkable, so the player could navigate between the various islands. Grow and collect 5 berries without falling in the abyss (or losing any of your tools) and you win.

I had wanted to expand on the wand functionality to allow the player to rotate the floating platforms before locking them in place, but at the time of creation, quaternion rotation wasn’t viable in Unreal blueprints, and would require some C++ to get working. Given my only C++ experience was making an ASCII game of minesweeper back in 2010, I did think that it was perhaps a little optimistic of me.

The game wasn’t flashy, but it worked and was completed (somewhat) within the time frame of Ludum Dare, so I was happy with the result. What I find wild however, was that less people played and rated this game than Baby On Board, despite all the faff you had to go through in its set up. There’s a Dropbox link available on the Ludum Dare submissions page if you want to give it a ago.

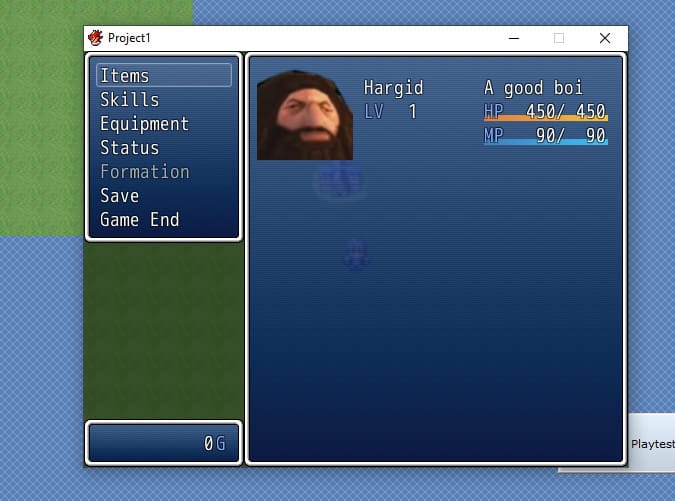
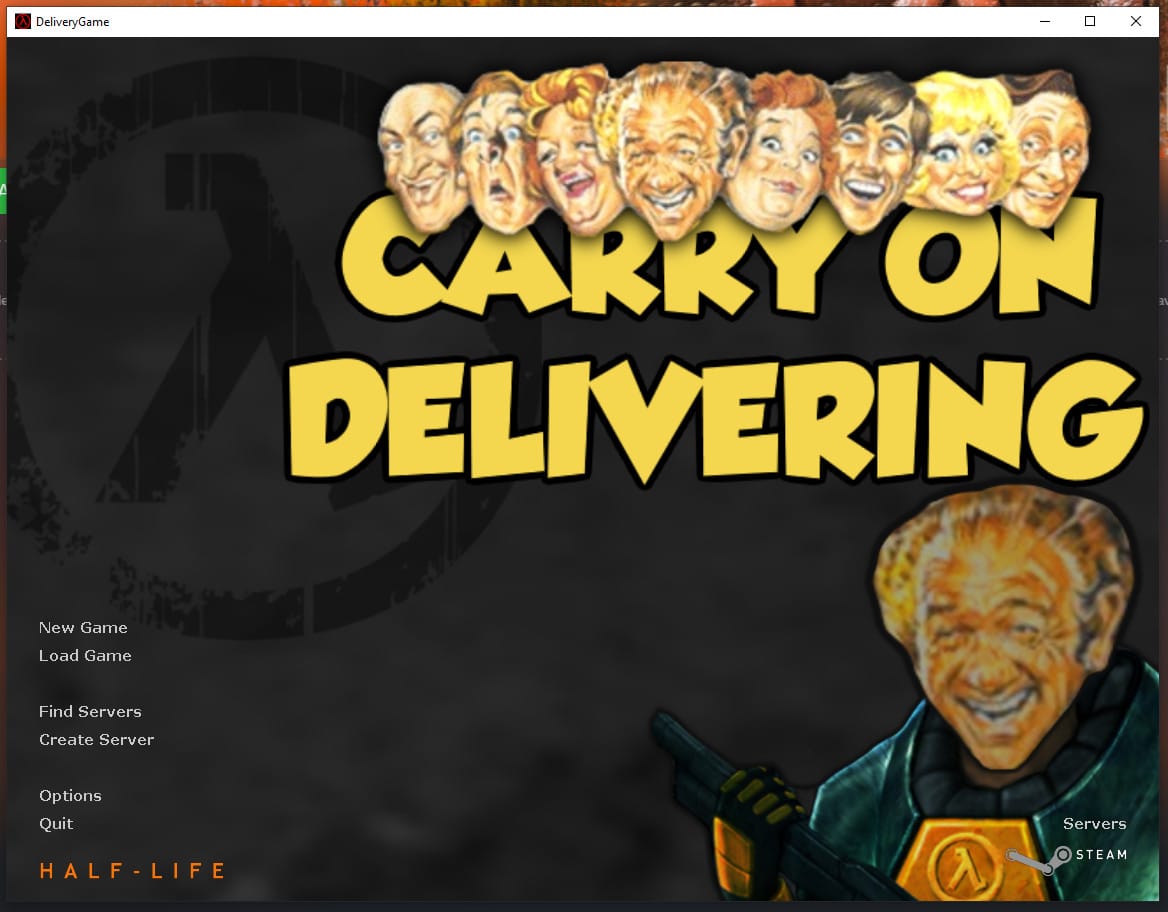
And there we have it. This was just a brief look into the game jams I have participated in over the last decade. There were others that I haven’t written about (namely because they hardly qualify as “game jam entries”). Most are half baked concepts that I thought would be funny, like the “Anvil of Sodom” a Hagrid themed JRPG made in RPG maker VX that failed due my lack of Ruby knowledge. Or “Carry On Delivering” a stand alone game built on top of Half Life 1, that was based on the Carry On Series (Where that concept came from, I have no idea).

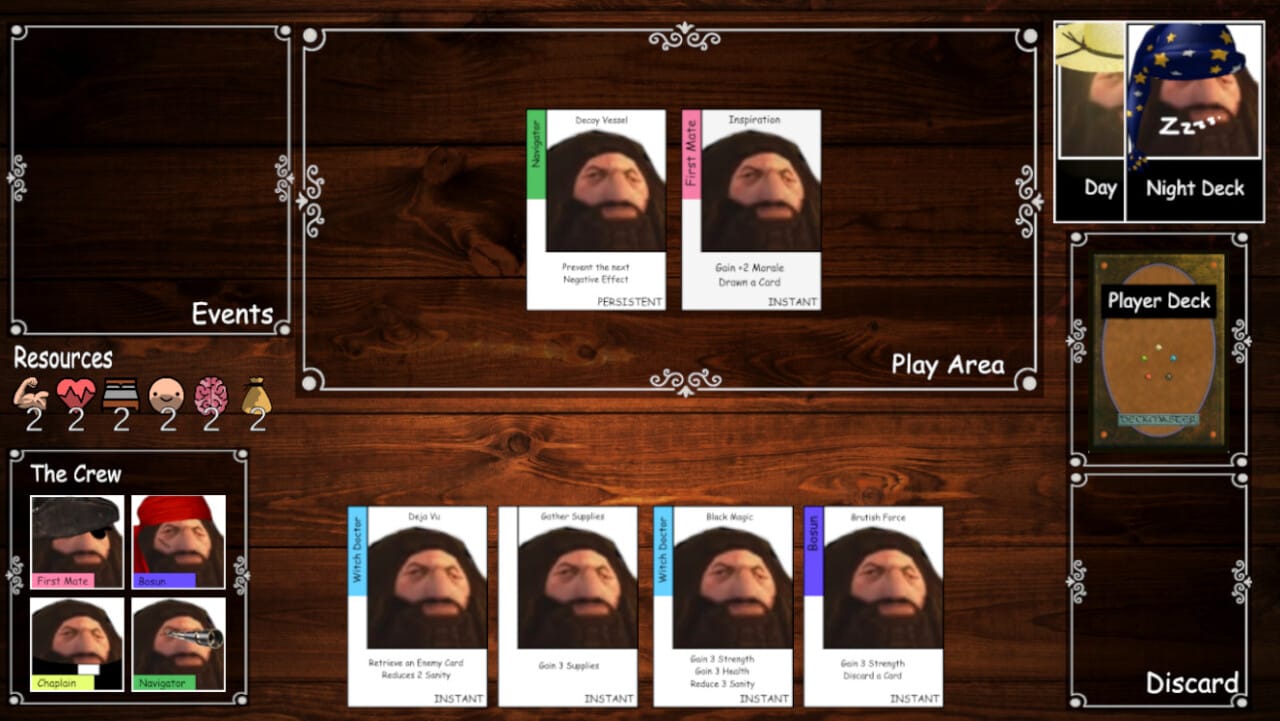
Or the real time digital card game that had a tick rate dictating when the player would draw a card or when an effect would trigger (that one actually had a good design and its a real shame it never materialised as I really think the idea has some fire behind it – though I probably should strip the Hagrid theme out first)

Ultimately, game jams are incredibly fun, and I highly recommend young and enthusiastic developers give them a try if they haven’t. You don’t have to make anything good (I’m evidence of that, and look how my career turned out!), you just need to make something you can look back on in 10 years, feel immensely proud of and then ultimately write a blog post about.