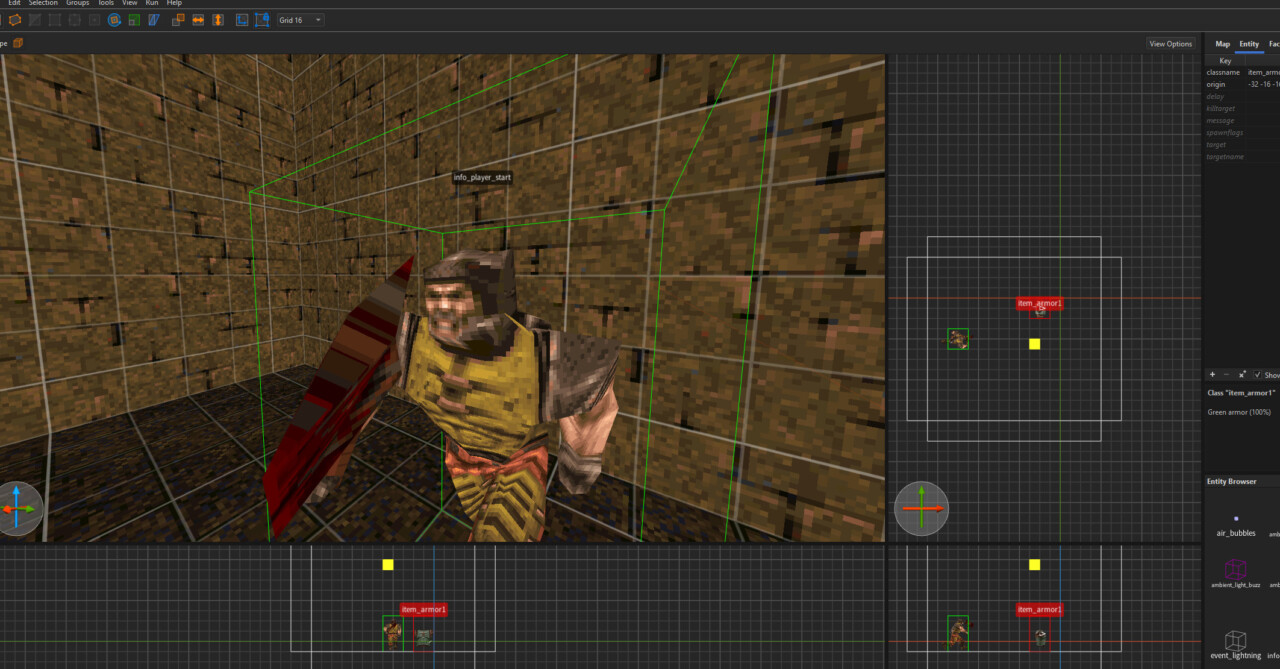
In order to start building a map for Quake, we’re going to need to install Trenchbroom and get it all set up. There are countless tutorials and guides out there that you can follow, but I figured there was no harm in me adding yet another one to the internet. Most of the information here has been compiled from dumptruck_ds’ quickstart tutorial video and from the Trenchbroom 2026.1-RC3’s reference manual, and whilst this can be a somewhat awkward and cumbersome task at first, once you’ve done it, you’ll never have to do it again. For the game jam and for this installation guide, I plan on using the latest released version of Trenchbroom which is v2026.1-RC3 on a Windows 64bit OS. For those who plan on using MacOX or Linux, I’m sure installation and set up instructions can be found online with a quick google search.
Preparation
Before we get started we will need to do a little prep work:
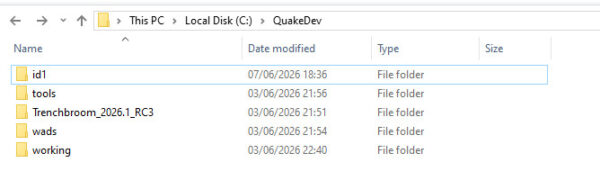
- We start by making a folder in the Root of our main Drive (it doesn’t matter what you call it, but the important thing is that it is in the root of the drive)
- For me, this is my C: drive, and I’m going to name the folder QuakeDev
- Inside of that QuakeDev folder we’re going to add 5 more folders:
- id1
- tools
- Trenchbroom (I name this the version of Trenchbroom I’m using)
- wads
- working
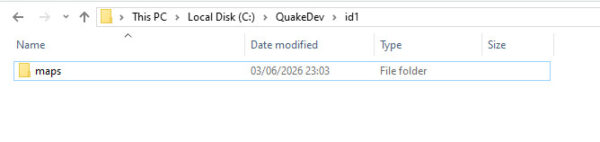
- Within the id1 folder, create another folder called maps
Setting Up Trenchbroom
As mentioned in the introduction, I’m going to be using Trenchbroom v2026.1-RC3. This is (at the date of writing) the most recent version of Trenchbroom. You are free to use whatever version of Trenchbroom you desire however:
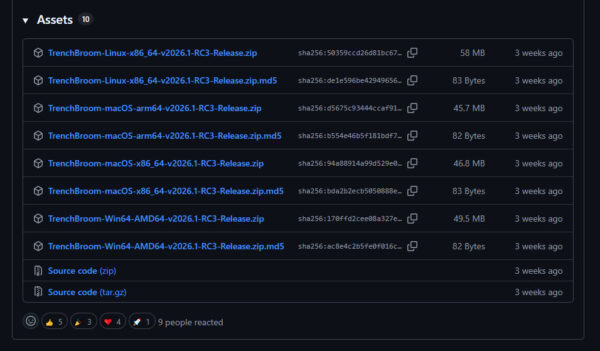
- Download the latest version of Trenchbroom here
- Scroll to the bottom of the git changelog and expand the “Assets” list
- Find and download the appropriate zip file for your operating system (Win64-v2026.1-RC3-Release in my case)
The changelog also suggests Window users download and install Microsoft Visual C++ Redistributable for Visual Studios (a link to which can also be found in the change log). I already had it installed previously from my work in Unreal and Unity, so I can’t verify if this is 100% necessary for our Quake mapping purposes, but there’s no harm in installing it just in case.
- Extract the Trenchbroom files into the trenchbroom folder you created.
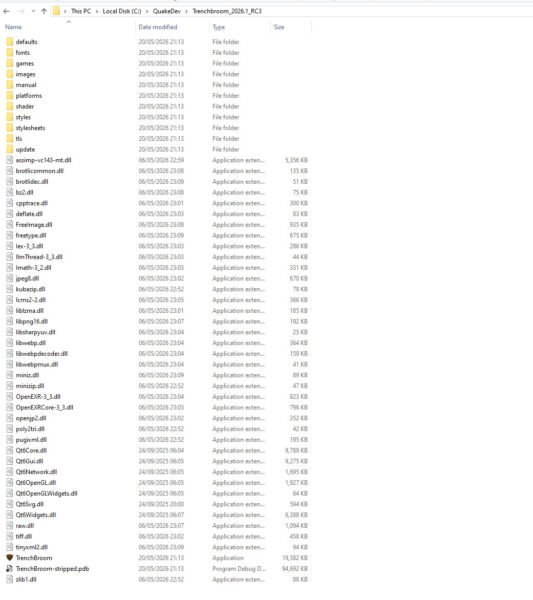
Next we’re going to need to populate Trenchbroom with Quake content. This comes in the form of PAK files. Simply put, a PAK file is used to store data that will be extracted and loaded by the Quake engine (this is typically game data, entity definitions, maps, sounds etc). In order to find these PAK files, you will need to obtain a legitimate version of Quake. I personally recommend the Bethesda remaster on steam. Not only is it relatively cheap and comes with all of the official expansions but there’s a whole host of QOL changes to graphics and input options that make the game far friendlier to play in 2026).
Pak0.pak is necessary for all Quake games to run, and pak1.pak appears to be needed too if you want the full library of Quake content to work with.
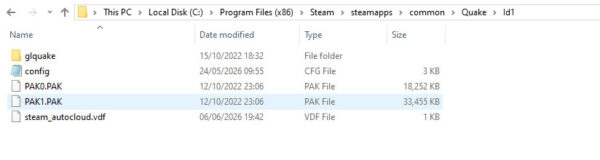
- Navigate to the Id1 folder in your game directory (mine is C:/ProgramFiles(x86)/Steam/streamapps/common/Quake/Id1)
- Copy the following files:
- config (if this file is missing, don’t worry – config.cfg will generate the first time you compile and test a map).
- PAK0.PAK
- PAK1.PAK
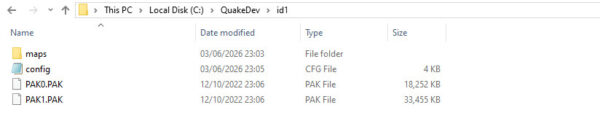
- Return to the QuakeDev folder you created in the previous section and paste these files into the Id1 file you created
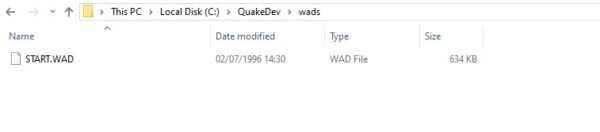
Textures are stored on WAD files, and we’ll need these as well. Unfortunately these aren’t directly available in the Quake game directory like the PAK files, so we’ll have to source them externally. Quaddicted is a great source for all things Quake related and the WADs can be found here easily to download. Just to get things working, find and download the start WAD and put it into the WADs folder in QuakeDev.
Downloading Compiling Tools
Once we’ve made a map, we’re going to need to compile it. Ericw-Tools is the standard compiling tools for many Quake mappers and they can downloaded directly from the website. I personally went with the stable branch, however I have no reason to believe the alpha branch is any less usable (and its probably better in many regards).
- Go to Ericw-Tools
- Download the either the Alpha or Stable version of the compiler tools
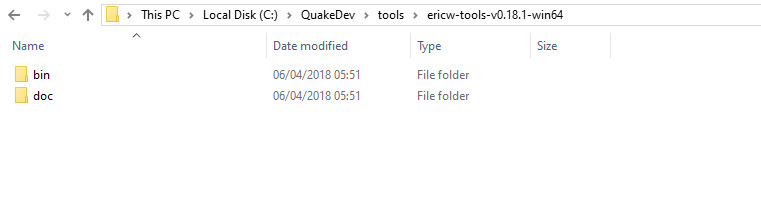
- Add a folder in your QuakeDev/Tools folder with the same version number of the compilers (mine is ericw-tools-v0.18.1-win64)
- Extract the files into that folder
At this point in other older tutorials, they will suggest you download Necros compiling GUI. This offers a developer friendly GUI to run the Ericw-Tools compilers we just downloaded, however newer versions of Trenchbroom have an integrated GUI that can handle that task instead, so it makes more sense to use the internal tools rather than adding another third party software to the workflow. If you still wish to install and use Necros Compiling GUI however, dumptruck_ds’ video has a link and all the information needed to set it up). For this tutorial however I will show you the configuration of the compiler using Trenchbrooms integrated GUI.
Downloading Quakespasm
The final stage of preparation is to set up the game files that will run our map when we’re mapping and testing. Most guides (including dumptruck_ds’ quick start guide) suggest using Quakespasm. Quakespasm is a cross platform Quake engine based on the SDL port of Fitzquake. I tried to dig up some reasoning as to why you should use this over the remaster on Steam as a way of playing your maps, and the only real answer I could get is that the load times are quicker and its less prone to bugs. I might experiment with this more, but for now let just download Quakespasm.
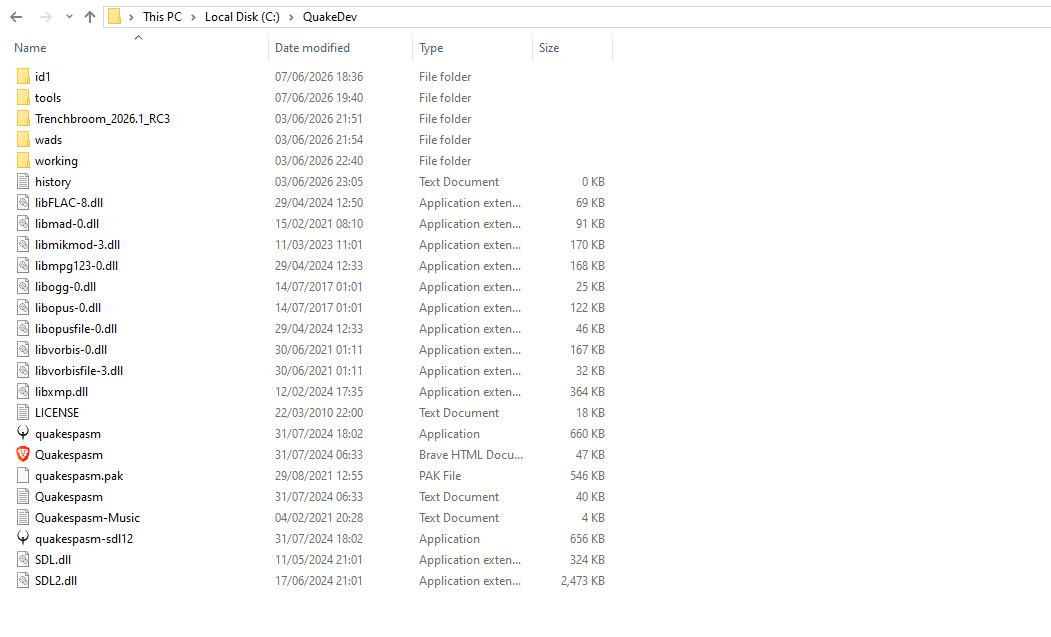
- Download Quakespasm from the official Sourceforge page
- Extract all files into the QuakeDev root folder
Final Setup
Now that all of the files are downloaded and placed, lets check Trenchbroom to ensure everything is working properly and get a very basic box room made up and compiled.
- Open Trenchbroom via the Trenchbroom.exe in your QuakeDev/Trenchbroom folder
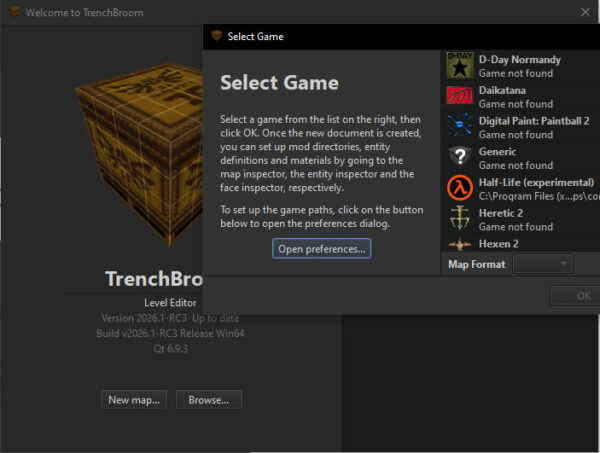
- Click “New Map”
- Click “Open Preference” and select Quake from the list on the left
- Click “Configure Engines” and make a new profile by clicking the little + button on the left
- Name the Profile something useful (I called mine “Quakespasm”)
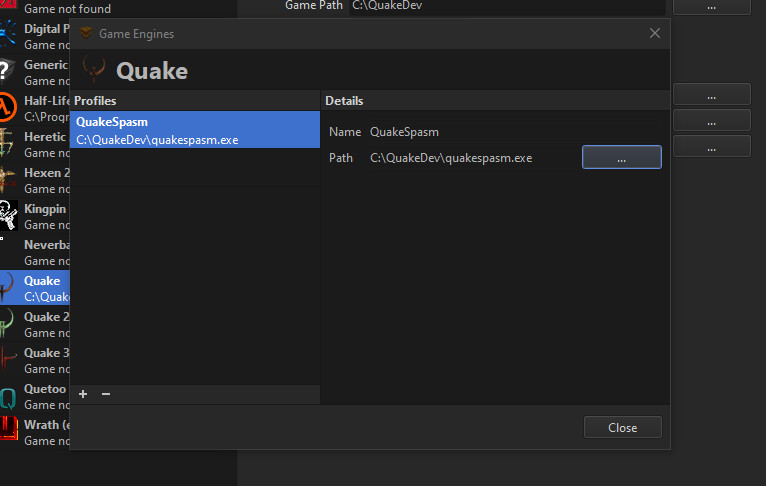
- Ensure the “Game Path” points to your C:/QuakeDev folder (as that’s where we extracted Quakespasm to)
- For each of the compilation tools, assign their path to the C:/QuakeDev/tools/ericw-tools/bin folder
- Each compilation (qbsp, vis and light) will be in the bin folder
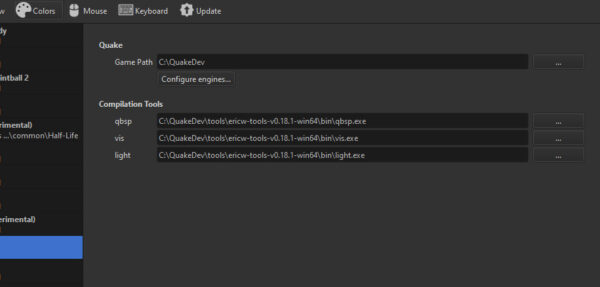
Whilst here you can also change the theme from system to dark in the view tab (very important) as well as adjust the layout, grid thickness, brightness, FOV (as well as a whole load of other editor options to play around with). I personally work on a four panes layout with everything else set to default.
- Click OK to apply the changes close the window.
- Select Quake from the list (ensure Map Format is “Valve”) and click “OK”
This will open the editor ready for you to start mapping! To ensure everything has been set up correctly, you can check the “Entity tab” in the right. Entities are game pieces we can work with in map making and they are extracted from the PAK files we added to the id1 folder in QuakeDev. If all previous steps have been followed correctly then the Entity Browser should be full of entities. If not then something has gone wrong and you should go back and retrace your steps through the installation process.
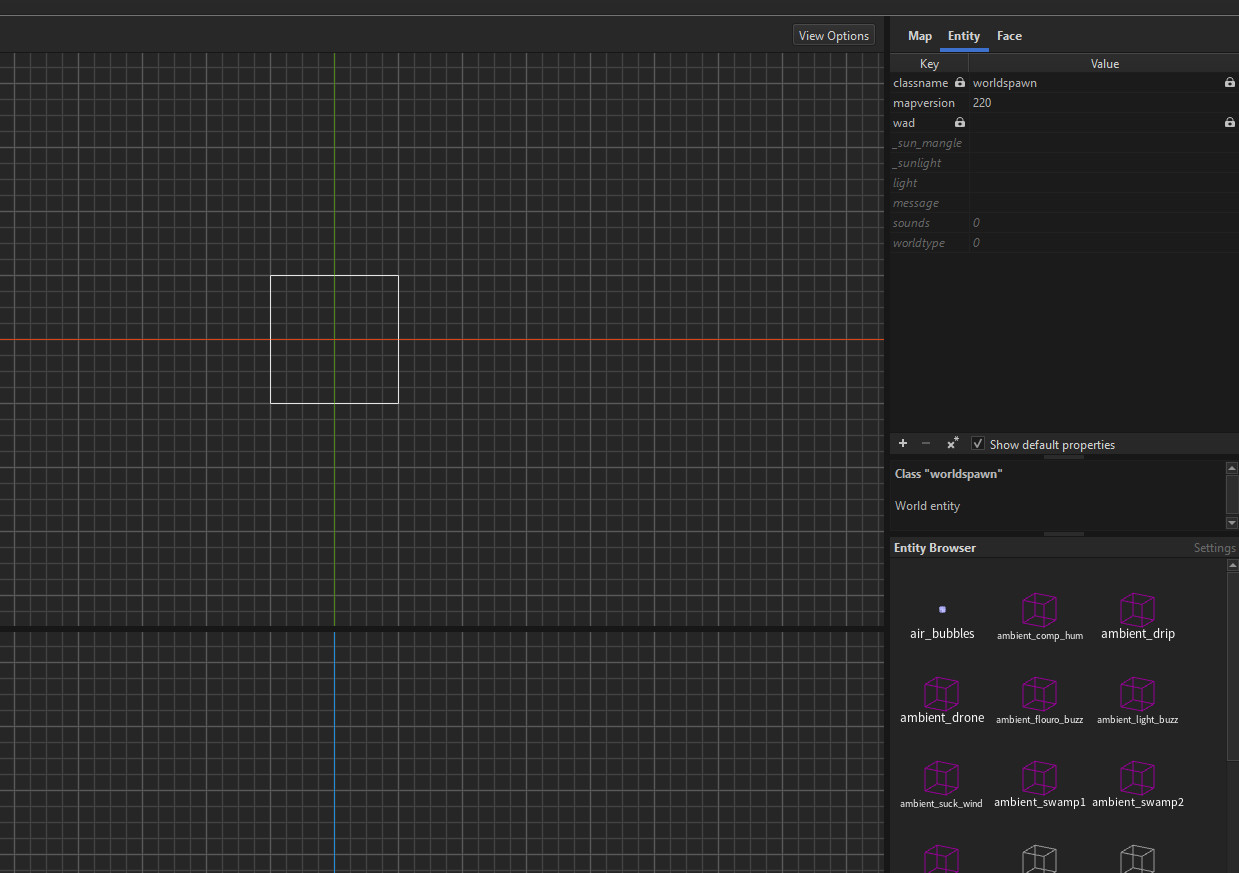
Whilst you still have the entity tab selected, we can add the START.WAD file we downloaded to give us some basic textures to work with.
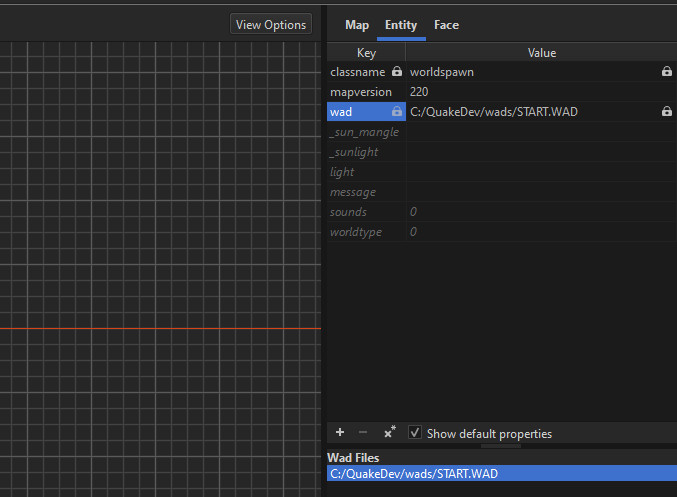
- From the list in the Entity tab, select the Key “wad” (this menu is context sensitive and clicking wad should display “Wad Files” in the section below the list).
- Click the + arrow and navigate to your START.WAD file in QuakeDev/wads
- Select “Absolute” and click “Ok”
- The WAD and the directory path will appear in the box
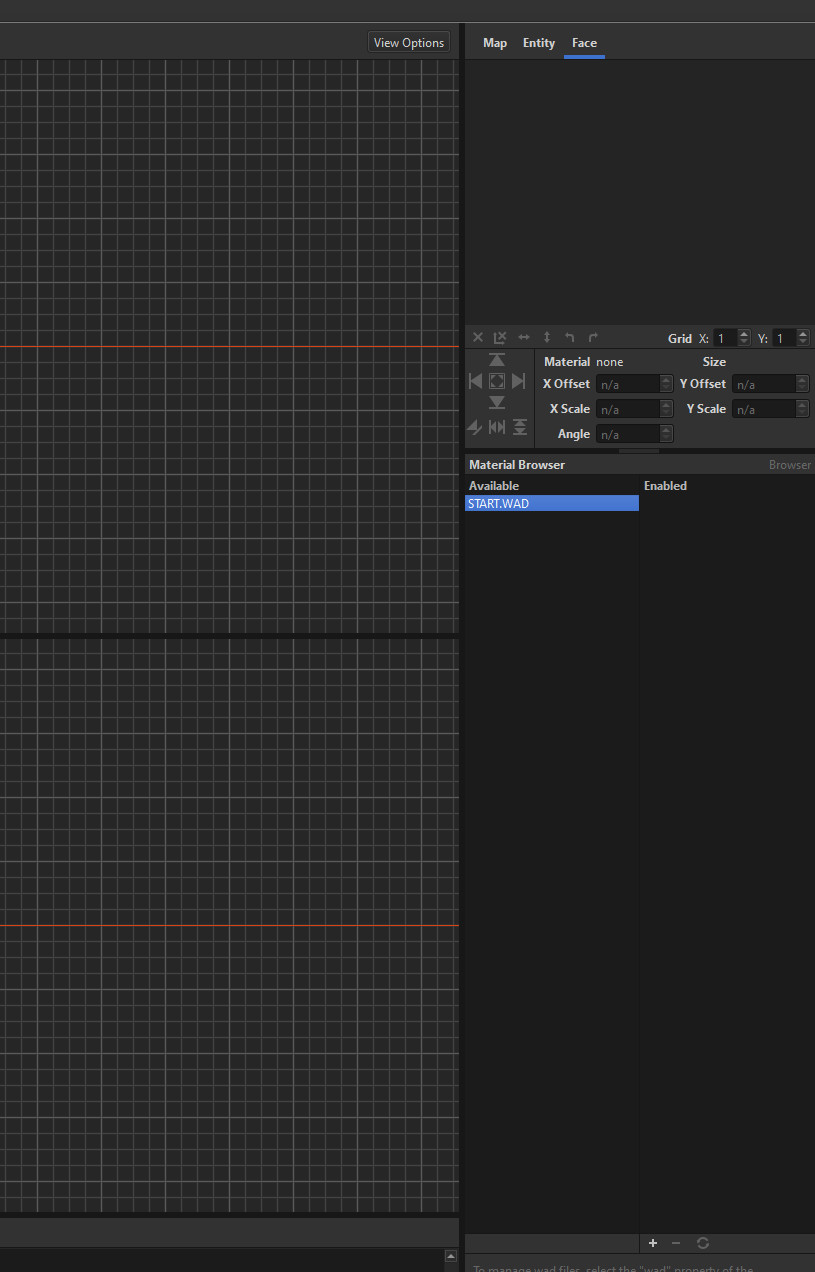
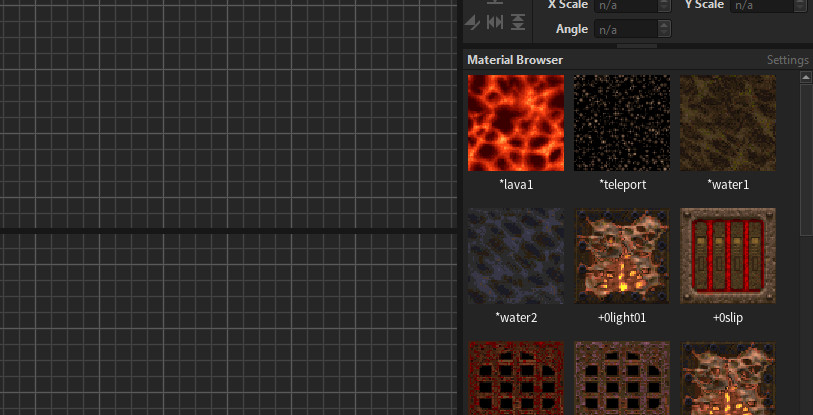
- You can see contents of the WAD file by selecting the Face tab at the top right
- If you don’t see any textures, click the title “Material Browser”
- Select Start.WAD from “available” and click the + icon to move it to “enabled”
- Click the title “Material Browser” again to see the textures
Compiler Setup
Its now time to set up the compiler for Trenchbroom. What we’re going to do is set up a bunch of sequenced tasks to successfully compile any map we make. You don’t need to know every single detail about a Quake Map compiling process, but it does help to know the basics. Compiling is the act of taking a working map file in Trenchbroom and converting it to a file that is readable by the Quake engine (a bsp file). This typically consists of three stages, QBSP, Vis and lighting.
QBSP is the first stage and is the process that builds and calculates all of the geometry and collision data, as well as extracting needed textures from the WAD file and repackaging them into the bsp file. A map is actually fully playable with just this step, however you’ll be missing lighting and and optimisation if you were to stop here. That said; if you’re wanting to quickly test logic or geometry changes and don’t want to go through a full compiling process (which on larger maps can take some time on lower end PCs) then setting up a profile just to run a QBSP compile might be worth it to save some time.
VIS is the stage of compilation that calculates PVS (Potential Visible Set) data for the level (If you’ve ever built a map in Source, this is essentially VisLeaf) and its used by the engine to calculate which parts of the map should be visible to the player based on their location. In its simplest form, its optimising the map for the player by breaking it into chunks and calculating which chunk should be rendered at that time. This is the part of the compiling process that can take the longest depending on your CPU.
Light is often the last stage of the compiling process and it calculates lightmaps for the level using each light entity found in the bsp file.
With that out of the way, lets set up the Compiler:
- Click “Run” from the top bar in Trenchbroom and select “Compile Map”
- Add a new Compiler Profile and call it “FullCompile” (leave the working directory set to its default value of ${WORK_DIR_PATH})
- Add the following tasks:
- Export Map
- Run Tool (this one is for QBSP)
- Run Tool (this one is for Vis)
- Run Tool (this one is for Lighting)
- Copy Files
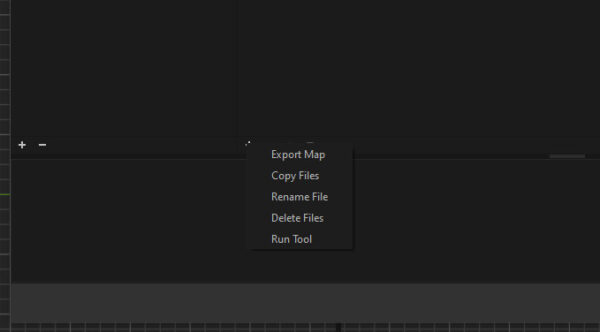
Parameters for each task are separated by a space, expressions are prefixed with a $. Additional information on compiler parameters can be found in the ericw-tools documentation and Trenchbroom Documentation. I will explain each task of the compile process and what each parameters mean, but if you just want to set the compiler up and get started, you can simply ignore the explanation and paste the parameters directly into the text box under each task.
Export Map
File Path: ${WORK_DIR_PATH}/${MAP_BASE_NAME}-compile.map
This task exports the map file to the File Path provided. If our map is called Map1, what this will do is write a copy of the Map file called “Map1-compile.map” to our working directory, which in our case is “QuakeDev/id1/maps”. Its not immediately clear as to why the documentation suggests we do this, I can only assume its to backup and protect the main map file during compilation, as this new “-compile” version of the map is the one that is read by the compiler in subsequent tasks.
- ${WORK_DIR_PATH}/ – is a reference to the Working Directory of the map set in the Compiler profile. We left this as its default value which simply points to the folder which our map is saved in.
- ${MAP_BASE_NAME}-compile.map – is what the new map will be called. In this case it references the name of our map and appends a suffix “-compile” to the end
Run Tool (QBSP)
Tool Path: C:/QuakeDev/tools/ericw-tools-v0.18.1-win64/bin/qbsp.exe
Parameters: ${MAP_BASE_NAME}-compile.map ${MAP_BASE_NAME}.bsp
This task runs the QBSP executable file in the ericw-tools folder, and writes the bsp data to a .bsp file. The two parameters needed for this task are:
- ${MAP_BASE_NAME}-compile.map – the map file which will be read by the QBSP.exe
- ${MAP_BASE_NAME}.bsp – the name of the bsp file that will the bsp data will be written to. In this case it’s just the name of the map
Run Tool (Vis)
Tool Path: C:/QuakeDev/tools/ericw-tools-v0.18.1-win64/bin/vis.exe
Parameters: -threads ${CPU_COUNT -1} ${MAP_BASE_NAME}.bsp
This task runs the Vis executable file in the ericw-tools folder, and writes the PVS data to a .bsp file. The two parameters needed for this task are:
- -threads ${CPU_COUNT -1} – this parameter goes over my head as my knowledge of CPU cores and threads is almost non existent, but my understanding is that this is explicitly telling the CPU to use the maximum number, minus 1, of threads available during the vis compile.
- ${MAP_BASE_NAME}.bsp – the name of the bsp file to write the PVS data to
Run Tool (Light)
Tool Path: C:/QuakeDev/tools/ericw-tools-v0.18.1-win64/bin/light.exe
Parameters: -threads ${CPU_COUNT -1} ${MAP_BASE_NAME}.bsp
This task runs the Light executable file in the ericw-tools folder, and writes the lightmap data to a .bsp file. The two parameters needed for this task are:
- -threads ${CPU_COUNT -1} – see above
- ${MAP_BASE_NAME}.bsp – the name of the bsp file to write the Lightmap data to
Copy Files
Source File Path ${WORK_DIR_PATH}/${MAP_BASE_NAME}.bsp
Target Directory Path: ${GAME_DIR_PATH}/${MODS[-1]}/maps
This task copies the bsp in the working directory to the maps directory within the last enabled mod. This is the file that will be read by Quakespasm to play the map. I actually am not entirely sure why this is needed (and why we can’t just run the bsp file from the working directory, but without this stage, you won’t be able to play your map from Trenchbroom, so its best to add it and not ask too many questions.
- ${WORK_DIR_PATH}/${MAP_BASE_NAME}.bsp – the working directory of the map file
- ${GAME_DIR_PATH}/${MODS[-1]}/maps – the maps folder in the last enabled mod of our game directory (in this case QuakeDev/id1/maps). $MODS[] is an array containing all enabled mods for the current map. I’m not entire sure I understand what’s going on here however.
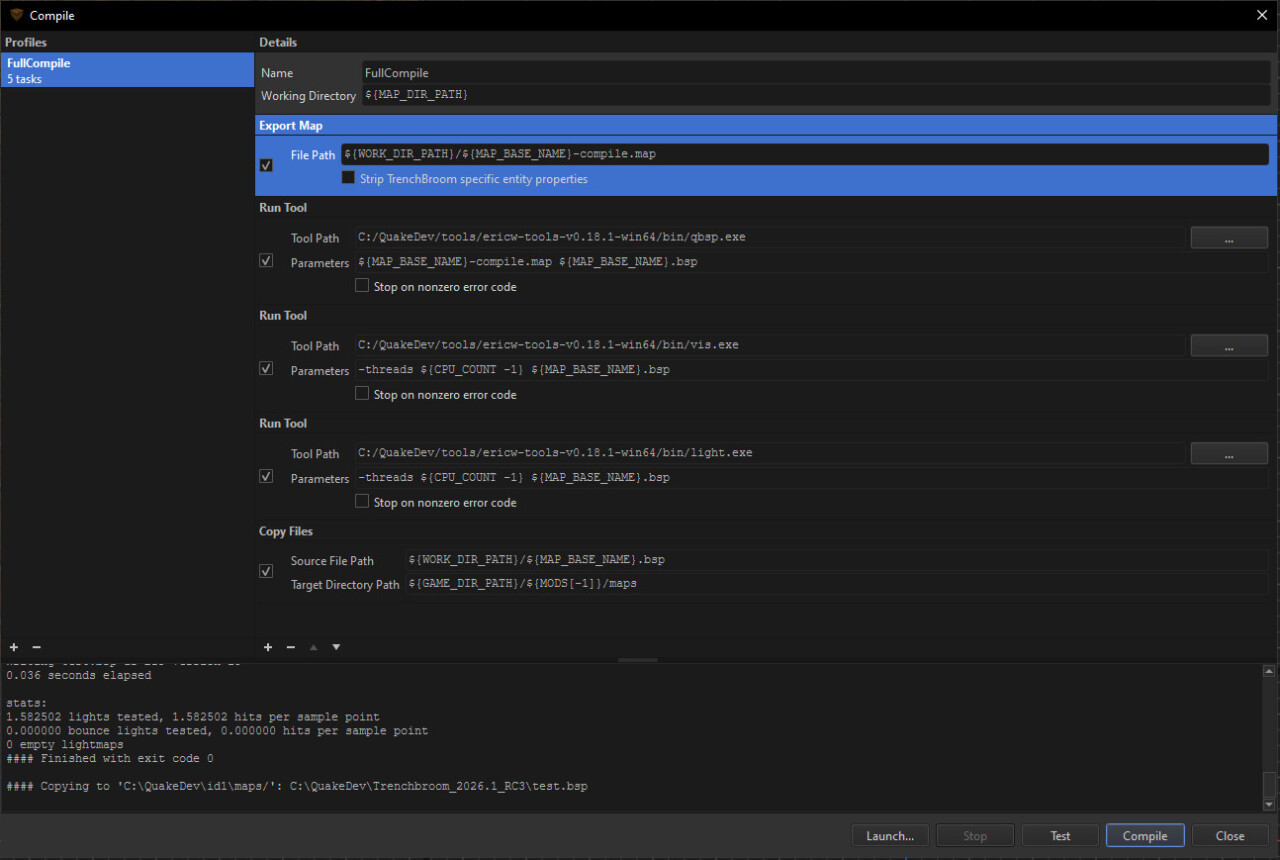
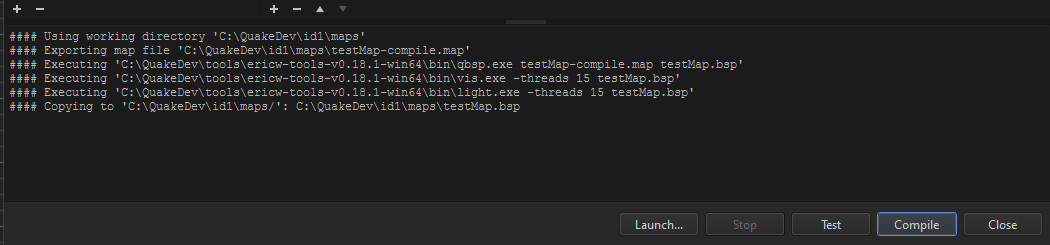
And that’s it, the compiler is set up. If you want to test and make sure everything works; save the current scene as something like “testMap” and click the Test button. A console log should be printed displaying the following:
Lets See It All Working
You’re done! Trenchbroom is ready to be used. It would be a shame however, not to end this post without seeing it all working and ensure our setup is correct. So lets make a very quick room, with some geometry, a player start, and a point light. Don’t worry about understanding any of this for now, as in the next post, I will walk you through the basics of mapping in Trenchbroom, including UI navigation, brush manipulation, texturing etc.
- In the perspective 3D view, click on the cube and Hold the SHIFT key – this will enable brush manipulation
- Hover over the sides and extend them out to make the brush a bit bigger (we will use this as a floor piece)
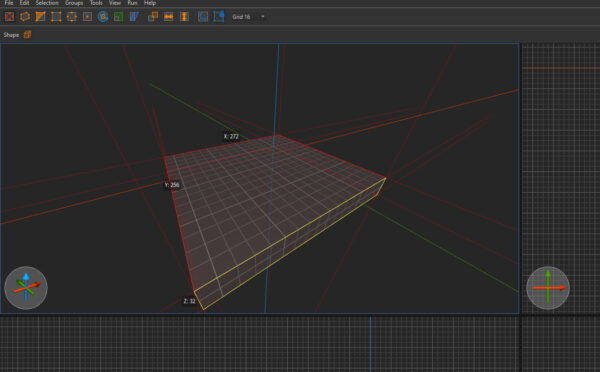
- With the brush still selected, press CTRL+D to duplicate it
- In an orthographic view, click and drag the new brush to the side
- Resize the brush to create a wall
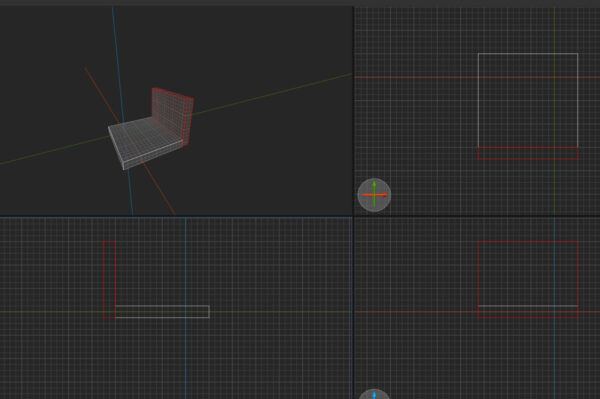
- Duplicate the wall brush 3 more times to create 4 walls surrounding the floor piece
- Duplicate the Floor and move it up to create a roof piece and seal the room (its important that the whole room is sealed, as gaps into the void will create leaks and the map won’t compile correctly)
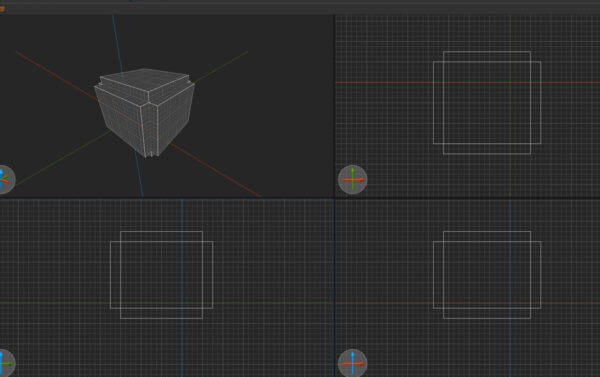
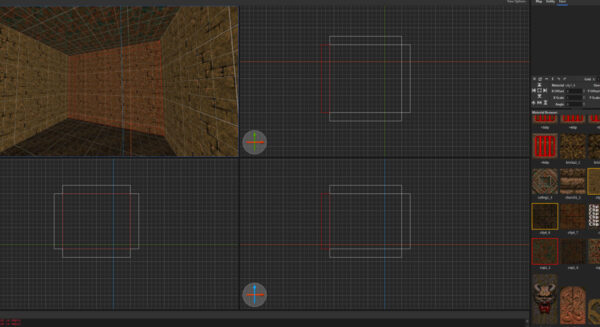
- Inside of the room we have just created, select the four walls
- Navigate to the “Face Tab” in the top right and select a texture to apply to them (I went with city1_4)
- Apply a different texture to the floor brush and a third texture to the ceiling
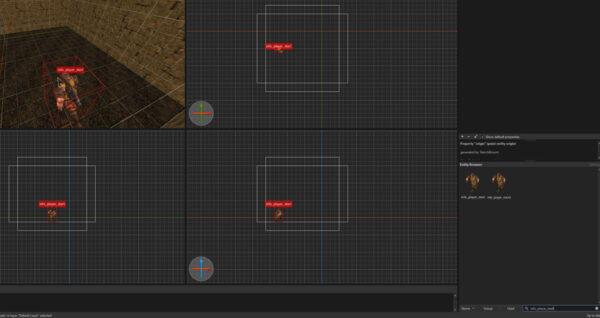
- Navigate back to the “Entity Tab” and using the Entity Browser search bar in the bottom right; search for “info_player_start”
- Click and drag the entity into the world (this will be the spawn point for the player)
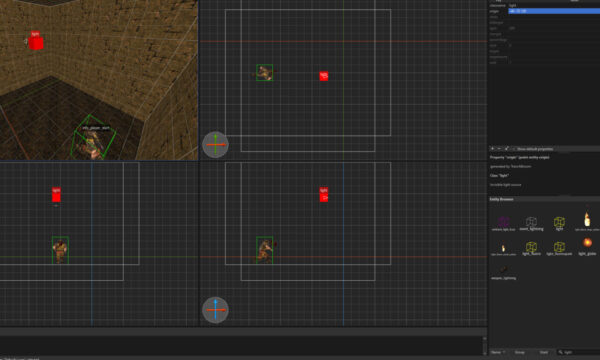
- Search the Entity Browser for “light” and drag it into the scene
- Save the map, Select Run from the top bar and then select Compile
- Compile the map
- Select “Launch”
- Select your QuakeSpasm launch profile and in the “Parameters” add “+map ${MAP_BASE_NAME}”
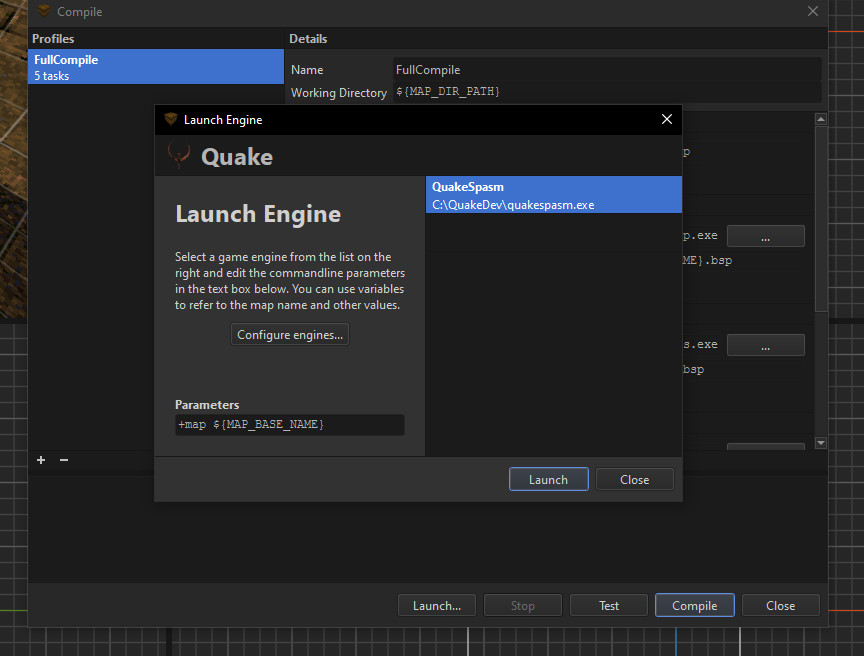
This will load the map you have just compiled by default. Press launch and see your very basic room in engine!
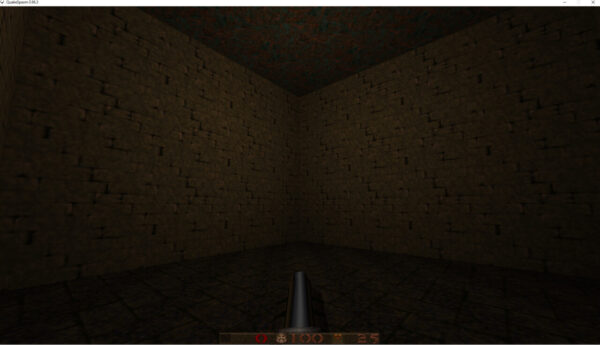
And there you have it! A functioning Trenchbroom to start mapping in! Next post I will be going into more detail as to how to use Trenchbroom and become more proficient with the tools.